
What Coaches Look for in Youth Sports Development

Last updated by Editorial team at fitbuzzfeed.com on Wednesday 28 October 2026
Article Image for What Coaches Look for in Youth Sports Development

What Coaches Really Look For in Youth Sports Development

In most youth sports programs, only a handful of players will go on to elite competition, but every child has the chance to develop skills that matter for life: resilience, teamwork, self-discipline, and joy in movement. When parents or young athletes ask what coaches are "really" looking for, they often focus on obvious markers like speed, height, or early success in games. Yet experienced coaches, especially in long-term development programs, consistently emphasize a different set of qualities-many of which have little to do with early physical dominance and everything to do with how a young person learns, behaves, and responds to challenges. This unique document looks at youth development through the eyes of coaches across multiple sports, drawing on current research in talent identification, growth and maturation, and child development. It explores the traits coaches value most, how those may change by age and level, and what families can realistically do to support a healthy, sustainable sports journey.

Beyond Talent: The Qualities Coaches Value Most

Coaches do care about physical ability, but they also know that early talent can be misleading. Children grow at different rates, and those who dominate at 11 may be overtaken by peers who mature later. Research from organizations such as FIFA and World Rugby has shown that relative age and early maturation heavily influence youth selection, which is one reason many top programs now focus more on behaviors than on early performance.

Across sports, several core qualities come up repeatedly when coaches describe the players they most want to work with: coachability, effort, attitude, and reliability. A "coachable" athlete listens, tries to apply feedback, asks questions respectfully, and doesn't shut down when corrected. Effort shows up not only in games but in how consistently an athlete works in practice, completes conditioning, and stays engaged even in drills that are not exciting. Attitude becomes visible in body language, how an athlete responds to mistakes, and how they treat teammates, opponents, and officials.

Reliability might sound mundane, but coaches often stress that being on time, showing up consistently, and doing what was agreed matters as much as highlight plays. These traits underpin long-term development: a reliable player will accumulate more quality practice, be trusted with responsibility, and earn more opportunities to grow. For parents and athletes looking to understand what coaches want, these behavior-based qualities are usually more controllable-and ultimately more predictive of progress-than early physical dominance.

Physical Foundations: What Matters at Different Ages

While character and attitude are central, youth sport is still physical, and coaches pay attention to certain movement qualities that provide a foundation for later performance. Leading sports science bodies such as the American College of Sports Medicine and UK Sport emphasize "athleticism before specialization": developing broad movement skills before narrowing into one sport.

In early and mid-childhood, coaches often look for general coordination rather than sport-specific polish. Can the child run, stop, change direction, jump, and land with control? Can they throw, catch, or kick with both sides of the body, even if not perfectly? These fundamental movement skills are linked to greater physical literacy and long-term participation, which is why multi-sport backgrounds are still valued in many countries. Coaches know that a 10-year-old with good coordination and balance can usually be taught sport-specific techniques over time, whereas correcting years of poor movement habits is much harder.

As athletes move into the early teen years, coaches begin to notice speed, agility, and power more. However, they also understand that growth spurts can temporarily disrupt coordination; a previously smooth mover may look clumsy for a season while their body catches up. Better development environments, including many high-performance academies, now adjust their expectations around peak height velocity and use growth tracking to avoid misjudging players during this awkward phase. For families, this means that a temporary dip in performance during a growth spurt is normal and not necessarily a sign that a child has "fallen behind."

For readers interested in building these physical foundations, resources on training, physical fitness, and fitness in general can help translate what coaches value into age-appropriate practice ideas.

Coachability: How Young Athletes Learn and Respond

When coaches talk about potential, they often describe how an athlete responds the first time they are challenged, corrected, or benched. A coachable athlete does not have to agree with every decision, but they are willing to reflect rather than react. This willingness to learn is especially important because, as research from organizations like Sport England and the Aspen Institute's Project Play has highlighted, youth athletes who feel supported in learning-not just judged on results-are more likely to stay in sport and develop over the long term.

Practically, coachability shows up in small, observable behaviors. Does the athlete make eye contact when a coach is speaking? Do they try the suggested adjustment in the next repetition or play, even if it feels awkward? Do they ask clarifying questions at appropriate times? When feedback is critical, do they become defensive, or can they acknowledge the issue and attempt to improve? Coaches understand that children will sometimes be emotional or discouraged, but over time they look for patterns: Does this athlete return to practice determined to get better?

Parents and caregivers can support coachability by modeling respect for coaching decisions, even when they disagree privately. Constant sideline coaching from adults, or undermining a coach's message in the car ride home, can confuse the athlete and make them less responsive in training. Encouraging children to take ownership-asking them what they learned, what they want to improve, and how they might do that-aligns closely with what coaches hope to see in a developing player.

Effort, Consistency, and the Daily Habits of Progress

From a development perspective, the most important "talent" is often the capacity to show up and work, week after week. Coaches know that the science of skill acquisition, as summarized by bodies like USA Hockey and Basketball England, points firmly toward high-quality, repeated practice as the engine of improvement. Natural ability can provide a head start, but without consistent effort it quickly plateaus.

In practice, coaches look for athletes who stay engaged across an entire session, not just during scrimmages or spotlight drills. This includes hustling between stations, staying focused during explanations, and putting genuine effort into warm-ups and conditioning. It also includes cognitive effort: paying attention to tactical instructions, learning plays, and staying mentally present rather than drifting through drills on autopilot. Over time, coaches notice who treats "boring" parts of training as opportunities to get better rather than as something to endure.

Consistency also extends beyond attendance. Sleep routines, nutrition, and recovery habits strongly influence how much an athlete gains from each session. Organizations such as the World Health Organization and Centers for Disease Control and Prevention emphasize the importance of regular physical activity combined with adequate rest for youth health. While coaches rarely control home life, they do notice which athletes come to practice chronically tired, under-fueled, or distracted. Families who prioritize regular sleep, simple balanced meals, and manageable schedules help young athletes show the kind of steady effort coaches value.

For those wanting to align home routines with development, exploring resources on nutrition and wellness can be a practical starting point.

Attitude, Resilience, and How Athletes Handle Adversity

Sport is full of setbacks: missed shots, selection disappointments, injuries, and tough losses. Coaches pay close attention to how young athletes respond to these moments, because resilience is central to both performance and well-being. Research from the American Psychological Association and various sport psychology programs suggests that resilience is not a fixed trait but a set of skills and support systems that can be developed over time.

On the field, resilience can look like an athlete sprinting back on defense immediately after a turnover instead of dwelling on the mistake, or returning to practice with focus after being left out of a starting lineup. Coaches notice whether players stay engaged when they are substituted out, cheer for teammates, and keep their body language neutral or positive instead of visibly giving up. They also see who is willing to attempt difficult skills knowing they might fail, a sign that the athlete values learning over perfection.

However, it is important to distinguish resilience from suppressing emotion. Children and teenagers will sometimes be upset, cry, or withdraw temporarily. Good development coaches expect this and aim to create environments where emotions can be expressed and processed constructively. What they look for over time is whether the athlete can gradually bounce back, reflect on what happened, and take action to improve. Parents can support this by framing setbacks as part of the process and by avoiding catastrophizing around single games or selections.

Team Behavior, Communication, and Leadership Potential

Even in individual sports, training environments are social. Coaches therefore pay close attention to how young athletes interact with others. Team-oriented behaviors are often decisive when selecting squads or deciding who to trust in key moments. These include simple actions: helping set up or collect equipment, encouraging teammates after mistakes, and accepting roles that may not be glamorous but are important for the group.

Communication is another key area. Coaches value athletes who communicate clearly on the field-calling for the ball, organizing defense, or signaling in relays-and who can also communicate off the field in a respectful, solution-focused way. This does not require being loud or extroverted; quiet athletes can lead by example and still use concise, clear communication when needed. Over time, coaches often give more responsibility to athletes who demonstrate both empathy and accountability in their interactions.

Leadership, in the developmental sense, is less about wearing a captain's armband and more about influencing the environment positively. Coaches look for players who model effort, adopt team values, and help maintain standards even when adults are not watching. They also value those who include less experienced teammates, reduce cliques, and support diversity within the group. For youth athletes, developing these social skills can be as impactful for life as any technical ability learned in training.

Readers interested in the broader cultural and social dimensions of sport may find useful context in related coverage under sports and lifestyle.

Technical and Tactical Understanding: "Game Sense" Over Tricks

While physical attributes and attitude form the base, coaches ultimately need players who can execute the sport's skills and understand its tactics. At younger ages, most coaches prioritize basic technical competence: correct body positions, safe and efficient movement patterns, and a growing toolbox of fundamental skills. They often prefer a player with slightly less flair but more consistent fundamentals over one who relies on risky, inconsistent tricks.

As athletes mature, tactical understanding-sometimes called "game sense"-becomes increasingly important. Coaches look for players who can read the game: anticipating where the play is going, making good decisions under pressure, and adapting to opponents' strategies. This cognitive side of sport is strongly influenced by the quality and variety of practice. Organizations like FIBA and national coaching bodies often recommend small-sided games and decision-rich drills to build this intelligence, rather than over-relying on isolated, repetitive technique work.

Coaches also look for athletes who are students of the game. Do they watch matches thoughtfully, ask tactical questions, and show curiosity about strategy? Do they understand their role in different systems and formations, not just their individual job? Athletes who grasp the bigger picture are easier to integrate into different lineups and can often adapt across positions, which increases their value to the team and their long-term development potential.

For those wanting to deepen their understanding, exploring technology and training resources can help make sense of tools like video analysis, wearables, and tactical apps that many coaches now use in youth programs.

Health, Safety, and the Red Flags Coaches Notice

Responsible coaches are increasingly alert to health and safety issues, recognizing that youth sport should support long-term well-being rather than jeopardize it. Guidelines from organizations such as the International Olympic Committee and national health agencies emphasize gradual progression of training loads, age-appropriate competition schedules, and careful management of injuries-especially concussions and overuse problems.

Coaches therefore notice red flags such as chronic pain, repeated injuries in the same area, extreme fatigue, or sudden drops in mood and performance that might signal burnout. They may also be wary of athletes whose schedules involve multiple teams and overlapping seasons with no meaningful rest, a pattern linked to higher injury risk in several studies. Early specialization in a single sport, particularly with year-round competition and high training volume, is another concern; many national governing bodies now explicitly recommend multi-sport participation in childhood.

Nutrition and body image are additional areas where coaches must be cautious. Unhealthy weight-control behaviors, excessive focus on leanness, or pressure around appearance can contribute to disordered eating and relative energy deficiency in sport. Resources from organizations like NCAA and health-focused bodies can help coaches and families recognize warning signs. On the positive side, coaches value athletes who communicate honestly about pain or fatigue, follow medical advice, and understand that rest and recovery are part of high-quality training, not signs of weakness.

Readers looking for broader context on health and sport can explore health, wellness, and world sections, where athlete welfare, participation trends, and policy changes are frequently discussed.

Parents, Pressure, and the Environment Around the Athlete

Coaches do not select parents, but the family environment can strongly influence a young athlete's experience and development. Many coaches, when asked what they look for, mention supportive, realistic parents almost as quickly as they mention player traits. A constructive parent-coach relationship can create a stable triangle around the athlete; a conflicted one can turn sport into a source of stress.

Coaches generally appreciate parents who prioritize the child's enjoyment and growth over short-term results, who respect boundaries around playing time and tactical decisions, and who handle concerns through appropriate channels and timing. They value families who understand that development is non-linear: players will have ups and downs, and not every season will bring a promotion or starring role. Parents who avoid constant comparison with other children, resist the urge to over-schedule, and encourage multi-sport participation in the early years often help their children maintain a healthier relationship with sport.

At the same time, systemic pressures-such as early selection into elite pathways, scholarship hopes, or professional dreams-can make it difficult for families to stay grounded. National and international bodies, including UNICEF and several athlete advocacy groups, have highlighted the need to protect children's rights in sport, including the right to play, to rest, and to be free from abuse and exploitation. Awareness of these broader issues can help parents and coaches align around a shared goal: using sport as a positive force in a young person's life rather than a narrow route to success. For more new reporting of how business, culture, and policy intersect with youth sport, readers may find relevant pieces in news and business.

Putting It Together: What Young Athletes Can Control?

When all of these elements are combined, a clearer picture emerges of what coaches genuinely value in youth sports development. Physical attributes and technical skills matter, but they are only part of the equation and are heavily influenced by age and maturation. What stands out across sports and levels are qualities that young athletes can influence daily: effort, attitude, coachability, teamwork, and the willingness to learn from both success and failure.

For young athletes, this means focusing on showing up consistently, working hard in all parts of practice, listening to feedback, treating others with respect, and staying curious about the game. For parents and caregivers, it means supporting healthy routines, keeping perspective on results, and building a partnership with coaches grounded in trust and open communication. For coaches, it means remembering that every selection decision involves a child, and that development is as much about who athletes become as people as it is about what they achieve in competition.

Youth sport will always involve competition and selection, but when everyone involved understands what coaches are really looking for-and why-those processes can better serve the long-term health, growth, and enjoyment of the children at the center of it all.

Indoor Cycling Workouts for Rainy-Season Fitness

Last updated by Editorial team at fitbuzzfeed.com on Tuesday 27 October 2026
Article Image for Indoor Cycling Workouts for Rainy-Season Fitness

Indoor Cycling Workouts To Keep Your Fitness On Track All Rainy Season

When weather, early darkness, or air quality make outdoor training unappealing, a stationary bike can quietly become the most reliable piece of equipment in your routine. Indoor cycling offers structured cardio, low-impact conditioning, and serious leg strength without needing perfect conditions outside-and it can be tailored for beginners through to competitive endurance athletes. This well researched guide breaks down how to use indoor cycling intelligently through the rainy season: how hard to ride, how often, how to structure sessions, and how to combine it with strength and mobility so you come out of the wet months fitter, not detrained.

Why Indoor Cycling Works So Well In Wet Weather

Indoor cycling stands out among rainy-season options because it gives a controllable, measurable workout with very low joint impact. On a stationary bike, smart trainer, or spin bike, resistance can be adjusted precisely, cadence can be tracked, and heart rate can be monitored in real time. For people managing knee, hip, or lower-back issues, this makes it a safer alternative to high-impact cardio such as running or jumping workouts, while still challenging the cardiovascular system.

From a health perspective, indoor cycling fits neatly into the aerobic activity recommendations from organizations such as the World Health Organization and U.S. Centers for Disease Control and Prevention, which suggest at least 150-300 minutes of moderate-intensity or 75-150 minutes of vigorous-intensity aerobic exercise per week for most adults. Because indoor cycling is easy to repeat several times weekly with minimal soreness, it's a practical way to hit those targets in months when outdoor time is limited.

Indoor environments also remove variables that can derail consistency: rain, slippery roads, poor visibility, and, in some regions, high pollution levels. That consistency matters for weight management, cardiovascular health, and performance. For those who enjoy data, many modern bikes and smart trainers connect to apps like Zwift, Peloton, or TrainerRoad, providing structured workouts, virtual routes, and social features that can make rainy-season training more engaging.

For readers who are building a broader home routine, indoor cycling also pairs well with strength and mobility work. Combining bike sessions with resistance training from our training and physical fitness coverage can deliver a rounded program that supports long-term health rather than just burning calories.

Setting Up Your Indoor Cycling Space Safely and Comfortably

Before diving into structured workouts, it's worth setting up a safe, comfortable training environment. Poor bike fit or a cramped corner can turn a promising habit into a source of pain or frustration. If you use a road bike on a trainer, aim for the same saddle height and reach you use outdoors. For gym or home stationary bikes, adjust saddle height so your knee is slightly bent at the bottom of the pedal stroke, not locked out. Handlebars should allow a neutral spine, not a rounded, strained position. Guidance from organizations such as British Cycling or USA Cycling can help with basic fit principles if you are unsure.

Ventilation is crucial. Indoor cycling generates a lot of heat, and without airflow your heart rate may drift upward as your body struggles to cool itself. A simple fan and an open window make a big difference, and a towel on the handlebars can keep sweat from dripping onto equipment. Hydration also matters more than some riders expect; indoor cyclists often drink less because they are not dealing with sun and wind, but sweat rates can actually be higher indoors. Keeping a bottle with water or a light electrolyte drink within reach is a good habit, especially for sessions longer than 45-60 minutes.

Footwear and contact points deserve attention too. Stiff-soled cycling shoes with cleats clipped into the pedals offer more efficient power transfer and may reduce foot discomfort during harder sessions, but many riders manage well with firm-soled training shoes and toe cages. If you feel numbness or tingling in the hands or saddle area, small adjustments to handlebar height, saddle tilt, and position can help. Our broader health and wellness coverage often highlights the importance of listening to early warning signs rather than pushing through discomfort.

Finally, think about safety and distraction. If you are following virtual classes on platforms like Les Mills or streaming films while riding, make sure screens are positioned so you are not craning your neck. Keep the floor clear around the bike to avoid tripping when dismounting after a hard interval. If you have cardiovascular or joint conditions, checking in with a health professional-such as those referenced by Mayo Clinic-before starting a new intense cycling program is sensible.

Understanding Intensity: Heart Rate, Perceived Effort, and Power

Effective rainy-season cycling is less about random pedaling and more about controlling intensity. Three common ways to gauge effort are heart rate, perceived exertion, and power output. Not everyone has access to a power meter, but nearly all riders can learn to use the other two.

Heart-rate zones are typically based on a percentage of maximum heart rate, which can be estimated with formulas but is more accurately found through testing. Organizations such as the American College of Sports Medicine and American Heart Association describe moderate intensity as roughly 64-76% of maximum heart rate and vigorous intensity as 77-95%. Many indoor bikes show heart rate if you wear a compatible strap or optical sensor, but even without such devices, perceived exertion-the sense of how hard you're working-remains a powerful tool.

A simple 1-10 scale works well. On this scale, 3-4 feels like easy conversation pace, 5-6 is steady but slightly breathy, 7-8 is hard but sustainable in short blocks, and 9-10 is an all-out effort you can hold only briefly. For general fitness, most rainy-season workouts should live between 4 and 8, with occasional very hard efforts for those who are healthy enough and accustomed to intense exercise. Our fitness coverage frequently emphasizes that "harder" is not always "better"; sustained consistency at moderate intensity often beats sporadic all-out sessions.

Riders with power meters or smart trainers can add another layer of precision, using metrics like functional threshold power (FTP) to define training zones. However, the principles remain the same: mix easier endurance work, moderate tempo efforts, and short high-intensity intervals across the week to stress different energy systems while allowing recovery.

Four Indoor Cycling Workouts Tailored To Rainy-Season Goals

The following sessions can be adapted to almost any indoor bike. Times and intensities are suggestions; adjust based on your current fitness, health status, and any advice from a medical professional.

1. Foundation Endurance Ride (40-60 minutes)

This is your base-building, calorie-burning, low-stress session-the kind you can repeat several times a week during the rainy season. After a 5-10 minute warm-up at very easy effort, ride 25-40 minutes at a perceived effort of 4-5 out of 10, where you can still speak in short sentences. Keep cadence in a comfortable range, often around 80-95 revolutions per minute, with enough resistance to feel engaged but not straining. Finish with a 5-10 minute cool-down at very light intensity and a few minutes of gentle stretching for the hips and lower back.

Endurance rides support heart health, fat metabolism, and mental decompression. They are also ideal days to combine cycling with light strength work-bodyweight squats, core exercises, or resistance-band work-which we frequently explore in our lifestyle and training content. If you are new to exercise or returning after a break, these rides may form the bulk of your rainy-season routine.

2. Interval Ladder for Fitness and Time Efficiency (30-40 minutes)

On days when time is short, structured intervals can deliver a potent stimulus in less than 40 minutes. After a 10-minute warm-up, ride a "ladder" such as: 1 minute hard (effort 7-8), 1 minute easy; 2 minutes hard, 2 minutes easy; 3 minutes hard, 3 minutes easy; then back down-2 minutes hard/2 easy, 1 minute hard/1 easy. Keep the hard segments challenging but controlled; you should be breathing hard but not completely unable to finish the set. Cool down for 5-10 minutes at very light intensity.

High-intensity interval training has been studied extensively by groups such as McMaster University and is often shown to improve aerobic fitness and insulin sensitivity efficiently when done safely. However, it is not appropriate for everyone. If you have cardiovascular risk factors or are new to exercise, build a base of easier rides first and consider lower-intensity intervals, such as 2-3 minutes at effort 6 followed by equal or longer recovery.

3. Strength-Style Hill Session (35-50 minutes)

Rainy months are an opportunity to build cycling-specific strength without worrying about actual hills or descents. After a 10-minute warm-up, increase resistance to simulate a climb and ride 4-6 repetitions of 4-5 minutes each at a lower cadence (around 60-75 rpm) and moderate-to-hard effort (6-7 out of 10). Recover for 3-4 minutes of easy spinning between efforts. Emphasize smooth pedal strokes, stable hips, and relaxed upper body; avoid mashing the pedals with poor form.

These "hills" target the glutes and quadriceps while challenging the cardiovascular system. For athletes who also participate in outdoor sports like running or field games once the weather clears, this type of session builds leg durability without the pounding associated with uphill running. It also complements resistance training for the lower body; readers can find additional leg-strength ideas in our sports and training sections.

4. Recovery Spin and Mobility Combo (20-30 minutes)

Not every rainy-day ride needs to be intense. A short, easy spin at effort 2-3 out of 10 can increase blood flow, reduce stiffness, and support recovery from harder workouts. Keep resistance light, focus on smooth pedaling, and maintain relaxed breathing. After 15-20 minutes, step off the bike and spend 10-15 minutes on mobility: hip flexor stretches, hamstring and calf stretches, gentle spinal rotations, and simple ankle mobility drills.

This lighter session is especially useful if you are following a more demanding weekly plan or combining cycling with resistance training, running, or team sports. Recovery rides align with the broader idea of "active recovery" often discussed by organizations like Sport England and national high-performance programs: movement that aids recovery rather than adding more fatigue.

How Often Should You Ride Indoors During the Rainy Season?

Frequency depends on your goals, schedule, and current conditioning, but some broad patterns work well for many people. For general health and weight management, three to five indoor rides per week, mixing endurance and interval sessions, typically provide enough volume to see progress while allowing rest days. A balanced example for a reasonably healthy adult might include two endurance rides, one interval session, one strength-style hill day, and one short recovery spin, with at least one full rest day.

For those training for endurance events-such as spring cycling sportives or triathlons-volume may need to be higher, but quality and recovery still matter. Many coaches and federations, including USA Triathlon, emphasize building a sustainable weekly rhythm rather than chasing big single sessions. In wet months, that often means more frequent, slightly shorter, well-structured indoor rides rather than sporadic long rides outdoors in unpleasant conditions.

Sleep, stress, and nutrition also influence how much indoor cycling you can handle. If you notice persistent fatigue, elevated resting heart rate, irritability, or declining performance, these can be signs to back off. Integrating rest days, light movement, and attention to diet-covered frequently in our nutrition section-helps ensure that rainy-season training supports health instead of undermining it.

Fueling and Hydration Strategies for Indoor Sessions

Because indoor cycling lacks the environmental cues of outdoor rides, it's easy to under-fuel or under-hydrate. Yet sweating in a warm, enclosed space can lead to significant fluid and electrolyte losses. For rides under 60 minutes at moderate intensity, water is usually sufficient, assuming you start well hydrated and eat regular meals. For higher-intensity intervals or sessions exceeding an hour, adding some carbohydrates and electrolytes becomes more important.

Sports-nutrition guidance from bodies such as the International Olympic Committee and Australian Institute of Sport suggests that endurance athletes may benefit from 30-60 grams of carbohydrates per hour in longer sessions, though most recreational riders doing 45-minute indoor classes won't need that much. A banana beforehand, a small snack afterward, and a bottle with a light electrolyte mix often cover the basics for many people.

Sweat rates vary widely, so paying attention to how you feel-headache, dizziness, or an unusual drop in performance-matters. If you finish sessions much lighter than you started, or if your urine remains very dark, these can be signs that hydration needs attention. However, overdrinking can also be an issue; sipping steadily rather than chugging large volumes at once is generally safer, in line with hydration advice from organizations like NHS in the UK.

Reducing Injury Risk and Discomfort on the Bike

Indoor cycling is low-impact, but it is not risk-free. Repetitive motion in a fixed position can aggravate issues in the knees, hips, and lower back if bike fit, volume, or intensity are off. Knee pain around the front of the joint often relates to saddle height (too low increases stress) or excessive resistance at a low cadence. Hip or lower-back discomfort may be linked to a saddle that is too high, too far back, or handlebars that are too low, forcing you into an aggressive position for which your core is not ready.

If discomfort persists despite small adjustments, consulting a physiotherapist or sports medicine professional-such as those associated with Cleveland Clinic or similar organizations-can help identify muscular imbalances or movement restrictions. Strengthening the glutes, hamstrings, and core, and maintaining hip mobility, often reduces cycling-related aches. Incorporating off-bike strength sessions once or twice a week, even for 20-30 minutes, can be transformative over the course of a rainy season.

Listening to pain signals is important. Sharp or worsening pain, joint swelling, or symptoms like chest tightness, severe shortness of breath, or irregular heartbeat are reasons to stop exercising and seek medical advice. Our broader health and world coverage frequently highlights that early intervention is usually more effective than pushing through and hoping an issue resolves on its own.

Making Indoor Cycling Mentally Sustainable

One of the biggest challenges in rainy-season training is not physical but psychological: staying motivated when every ride happens in the same small space. Variety, clear goals, and a bit of social connection can help.

Virtual platforms such as Zwift and Rouvy simulate outdoor routes and group rides, while services like Peloton, Les Mills, or gym-based spin classes add instructor-led structure and music. Some riders prefer podcasts or audiobooks during steady endurance rides, switching to more upbeat music for intervals. Rotating between these options from session to session can keep things fresh.

Setting short-term goals-such as completing three rides a week for a month, improving the number of intervals you can complete at a given effort, or extending your comfortable endurance ride by 10 minutes-provides tangible markers of progress. Tracking these in a training app, spreadsheet, or simple notebook can be motivating, especially when weather or life stress makes training feel harder. Our independent and unaffiliated news and events sections sometimes highlight virtual challenges and charity rides that can also add purpose to indoor sessions.

Finally, it helps to frame indoor cycling not as a second-best substitute for outdoor riding but as its own valuable tool. Rainy-season indoor work can sharpen fitness, improve pedal technique, and build resilience, setting you up to enjoy outdoor sports more when conditions improve.

Bringing It All Together

A well-planned rainy-season approach to indoor cycling blends structure with flexibility. Most people benefit from a mix of easy endurance rides, time-efficient interval sessions, strength-style hill work, and gentle recovery spins, supported by decent bike fit, hydration, and off-bike strength and mobility. For those who love data and virtual worlds, modern platforms offer a rich training environment; for those who prefer simplicity, a basic stationary bike and a few tried-and-tested session templates are enough.

Whether your goal is general health, weight management, or maintaining performance for outdoor sports, a consistent indoor cycling routine can turn the wet months from a training setback into a quiet advantage.

The Best Exercises for Stronger Hips and Glutes

Last updated by Editorial team at fitbuzzfeed.com on Monday 26 October 2026
Article Image for The Best Exercises for Stronger Hips and Glutes

The Best Exercises for Stronger Hips and Glutes

Stronger hips and glutes are not just about aesthetics. They influence how powerfully you run, how safely you lift, how stable you feel on stairs, and how resilient you are against back, knee, and even ankle pain. For many active people, undertrained hip muscles are the quiet weak link behind recurring injuries and plateaus. The good news: targeted, consistent training can dramatically change that.

This guide breaks down the most effective hip and glute exercises, how to sequence them, and how to adapt them whether you train in a gym or at home. It also highlights how hip strength connects to overall fitness, performance, and long-term health.

Why Hip and Glute Strength Matters More Than You Think

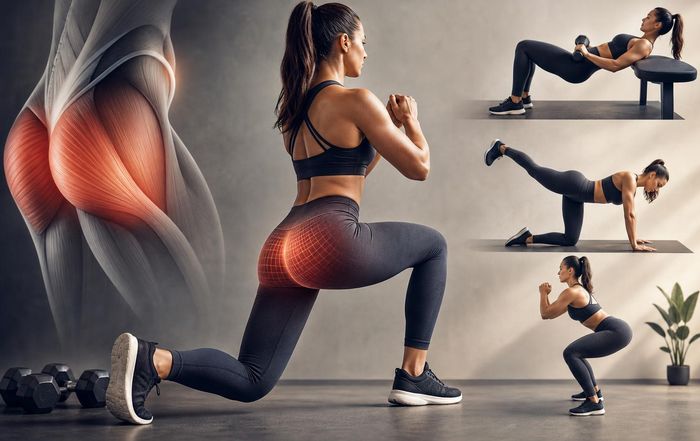
The glutes-gluteus maximus, medius, and minimus-along with the surrounding hip muscles form the engine room of lower-body movement. The gluteus maximus is a prime hip extensor that powers climbing, sprinting, and heavy lifting. The smaller gluteus medius and minimus stabilize the pelvis, keeping your hips level when you walk, run, or stand on one leg. When these muscles are weak or poorly coordinated, other joints are forced to compensate, often leading to discomfort or injury.

Research from organizations such as the American Council on Exercise (ACE) and the National Strength and Conditioning Association (NSCA) has linked inadequate glute strength to common problems like patellofemoral knee pain, iliotibial band issues, and some forms of low back pain. Runners and field-sport athletes often show hip abductor weakness on the side of overuse injuries. For everyday life, stronger hips can mean better balance, more confident walking speed, and reduced fall risk as people age, themes frequently highlighted by public health agencies like the U.S. Centers for Disease Control and Prevention.

From a performance standpoint, hip extension and hip stability are central to sprinting, jumping, and change of direction. That is why strength and conditioning programs for sports-from soccer to track to basketball-prioritize hip-dominant lifts and single-leg stability work. For general fitness enthusiasts, focusing on the hips can also improve posture, enhance comfort during long periods of sitting, and support more efficient movement in everything from yoga to recreational hiking.

For readers wanting a broader training context, the hips and glutes sit at the heart of most full-body programs, making them a natural focus alongside other lower-body work such as squats and lunges. Our dedicated training and physical fitness coverage often returns to this region as a foundation for overall strength.

How to Structure a Hip and Glute Workout

Before diving into specific movements, it helps to understand how to organize them. A balanced hip-glute session usually includes four categories:

Hip-dominant compound lifts (e.g., deadlifts, hip thrusts)

Squat or lunge variations for overall leg strength

Single-leg and lateral (side-to-side) stability exercises

Activation and accessory work for smaller muscles and mobility

Most people need only 2-3 focused hip and glute sessions per week, often as part of a broader fitness routine. Total weekly volume might include 8-16 hard sets for the glutes, divided across those days. Beginners should start lower and increase gradually. Evidence summarized by organizations like the American College of Sports Medicine suggests that working in the 6-12 rep range for 3-4 sets per exercise is effective for strength and muscle growth, provided the load is challenging while still allowing solid technique.

Warm-ups should include light cardio, dynamic hip mobility drills, and low-load activation exercises. This not only prepares tissues but also reinforces the mind-muscle connection, something many people find especially helpful with the glutes, which can be "sleepy" after years of sedentary habits. For broader context on integrating strength with overall health, readers can explore our health and wellness sections.

Big Lifts: Foundational Compound Exercises

1. Barbell Hip Thrust

The barbell hip thrust has become a staple in strength and physique training because it targets the gluteus maximus through a large range of motion with heavy load. Popularized and studied by coaches and researchers including Bret Contreras, it consistently shows high glute activation in electromyography (EMG) studies referenced by groups such as the NSCA.

In a hip thrust, the upper back rests on a bench, feet are planted on the floor, and a barbell sits across the hips. Driving through the heels, you extend the hips until the torso is parallel to the floor, squeezing the glutes at the top and avoiding excessive arching of the lower back. This movement is especially useful when the goal is maximal glute development without overloading the knees.

For those without access to a barbell, bodyweight and dumbbell variations are still effective. Starting with a glute bridge on the floor and gradually progressing to elevated and single-leg versions can build a strong base. As with all loaded movements, progressive overload-adding weight, reps, or tempo challenges-is key for continued adaptation.

2. Deadlift Variations

Conventional, sumo, and Romanian deadlifts are among the most efficient ways to strengthen the entire posterior chain-glutes, hamstrings, and spinal erectors. Per guidance from organizations like USA Weightlifting (USA Weightlifting) and Strength and Conditioning journals, the deadlift is central to athletic development due to its carryover to jumping, sprinting, and total-body power.

The Romanian deadlift (RDL) is particularly glute- and hamstring-focused. Starting from a standing position with a barbell or dumbbells, you hinge at the hips, allowing a slight knee bend while maintaining a neutral spine, and lower the weight along the thighs until you feel a strong stretch in the hamstrings. Driving the hips forward and squeezing the glutes returns you to standing. The key is a controlled descent and avoiding rounding the back.

For people with limited equipment, single-leg RDLs using a dumbbell or kettlebell are excellent. They challenge balance, hip stability, and anti-rotation strength, making them valuable for runners and field-sport athletes. Those new to deadlifting may benefit from coaching or instructional resources from reputable bodies like the NSCA or ACE to refine technique and reduce injury risk.

Squat and Lunge Patterns for Comprehensive Lower-Body Strength

3. Back Squat and Front Squat

Squats are often considered the "king" of lower-body exercises because they work the quads, glutes, hips, and core simultaneously. While back squats place the bar across the upper back, front squats hold the bar in front of the shoulders, shifting more emphasis toward the quads and core but still engaging the glutes strongly, especially at deeper ranges of motion.

Biomechanics research cited by organizations such as the National Institutes of Health suggests that deeper squats tend to recruit more glute activation, provided they are performed safely and within an individual's mobility limits. However, depth should never come at the expense of spinal alignment or knee comfort. Many people benefit from gradually increasing range of motion as hip, ankle, and thoracic mobility improve.

Bodyweight and goblet squats are ideal entry points for beginners or those training at home. They allow focus on technique-foot stance, knee tracking, and torso position-before adding heavier loads. Integrating squats into a balanced training program that also includes hip hinges and single-leg work can help avoid overemphasizing the quads at the expense of the glutes.

4. Split Squats and Lunges

Split squats, Bulgarian split squats, and walking lunges are indispensable for glute development and hip stability. By placing one leg forward and one leg back, these exercises create a unilateral loading pattern that challenges balance, coordination, and the smaller stabilizing muscles around the hip and knee.

The Bulgarian split squat, where the rear foot is elevated on a bench or step, is particularly demanding on the front leg's glutes and quads. Keeping the torso slightly inclined forward and driving through the heel of the front foot encourages strong hip involvement. Many lifters find that this movement delivers a significant training effect even with modest weights, making it a favorite when heavy barbells are not available.

For runners and team-sport athletes, walking lunges and reverse lunges build strength through the full gait pattern, supporting more efficient and powerful strides. Those with knee discomfort may find that reverse lunges-stepping backward rather than forward-reduce stress on the front knee while still loading the glutes effectively. As always, smooth control and alignment of the knee over the toes are more important than how far or fast you step.

Single-Leg and Lateral Work: Building Hip Stability

5. Step-Ups

Step-ups mimic a fundamental daily movement-climbing stairs-while providing a controlled environment to load each leg individually. They primarily target the glutes and quads, with the added benefit of challenging balance and hip control. Using a box or step at roughly knee height, you drive through the entire foot of the working leg to stand tall, resisting the urge to push off strongly with the trailing leg.

Coaches often recommend step-ups for athletes who need unilateral power, such as soccer players or trail runners, and for people returning from lower-limb injuries under professional guidance. Adjusting box height, load, and tempo (for example, slower descents) allows the exercise to be tailored from rehabilitation to high-performance contexts. For home training, a sturdy step or low bench can suffice, making step-ups a versatile addition to minimalist routines.

6. Lateral Lunges and Cossack Squats

Most daily and gym movements occur in the forward-backward plane, yet sport and life frequently demand side-to-side control. Lateral lunges and Cossack squats (a deep lateral squat with one leg extended) address this gap. They target the glutes, adductors (inner thighs), and abductors, and they encourage the hips to move through a wider range of motion.

In a lateral lunge, you step to the side, sit back into the hip of the stepping leg, and keep the trailing leg relatively straight. The movement trains the glutes to control lateral shifts of bodyweight-a common element in cutting, shuffling, and stabilizing on uneven ground. Cossack squats deepen this range further and demand more mobility, making them better suited to lifters who already have a solid strength and flexibility base.

Lateral work can also reduce overuse patterns for runners and cyclists, whose sports are heavily linear. Integrating such exercises into a broader sports or performance program helps build more robust hips that can handle unpredictable real-world demands.

Targeted Activation and Accessory Exercises

7. Glute Bridges and Single-Leg Glute Bridges

Glute bridges are often the first exercise recommended for people who struggle to "feel" their glutes working. Lying on the back with knees bent and feet flat, you drive the hips upward by squeezing the glutes rather than arching the lower back. This simple pattern, when performed with intent, lays the groundwork for heavier hip thrusts and deadlifts.

Single-leg bridges increase the challenge by forcing each side to work independently, highlighting asymmetries and demanding more from the hip stabilizers. They are also useful for people who cannot yet tolerate heavy loading but need a strong stimulus for the glutes, such as those easing back into training after a layoff, ideally under guidance from a qualified professional or a physical therapist registered with organizations like the American Physical Therapy Association.

8. Clamshells and Side-Lying Hip Abductions

While often labeled "small" or "rehab" exercises, clamshells and side-lying hip abductions play an outsized role in training the gluteus medius and minimus. These muscles are crucial for keeping the pelvis level when standing on one leg, which occurs during every step of walking or running. Weakness here is frequently associated with knee valgus (knees caving inward) and hip drop.

Clamshells are performed lying on the side with hips and knees bent, lifting the top knee while keeping the feet together. Side-lying abductions involve raising the straight top leg toward the ceiling. For both, the focus is on controlled movement from the hip, not momentum from the lower back or swinging the leg. Mini-bands placed above the knees can increase resistance and engagement.

These drills are especially useful as part of warm-ups or low-load accessory work, particularly for people with a history of hip or knee issues. They are common components of evidence-informed rehabilitation programs described by sources such as the Chartered Society of Physiotherapy in the UK and similar professional bodies elsewhere.

9. Banded Walks and Monster Walks

Lateral band walks, monster walks, and similar banded drills are effective for activating the hip abductors and external rotators in a standing, functional position. With a resistance band placed around the ankles or just above the knees, you step sideways or diagonally while maintaining tension in the band and a slight hip hinge.

These exercises are widely used by strength coaches and physical therapists as part of dynamic warm-ups, especially for athletes who need strong lateral hip control. They can also complement heavier lower-body sessions by reinforcing proper knee alignment and glute recruitment patterns before moving into squats or deadlifts. Because they require minimal equipment, banded walks are particularly convenient for home or travel workouts.

Mobility and Flexibility: Making Strength Work Better

Strength alone is not enough if the hips cannot move freely. Prolonged sitting, common in modern work and study patterns, can shorten the hip flexors and alter pelvic position, potentially reducing glute contribution during movement. Integrating mobility and stretching around strength work can help restore more balanced function.

Dynamic warm-up drills such as leg swings, deep bodyweight squats, and hip circles prepare the joints for loading. After training, or on recovery days, static stretches for the hip flexors, piriformis, and hamstrings can be beneficial. Guidelines from health authorities like the World Health Organization and national bodies such as the NHS in the UK emphasize that flexibility and mobility are important components of overall physical function, particularly with aging.

For those dealing with persistent stiffness or pain, consulting a qualified clinician, such as a sports medicine doctor or physiotherapist, is essential rather than relying solely on online routines. Our broader health and lifestyle coverage frequently highlights when self-care is appropriate and when professional assessment is warranted.

Sample Hip and Glute-Focused Training Session

The best exercise selection depends on goals, equipment, and training history. However, a balanced example for an intermediate lifter with access to basic gym equipment might look like this:

Activation and warm-up: 5-10 minutes of light cardio, followed by clamshells, banded lateral walks, and dynamic leg swings.

Primary strength lifts: Barbell hip thrusts and Romanian deadlifts.

Unilateral and lateral work: Bulgarian split squats and lateral lunges.

Accessory and finisher: Single-leg glute bridges and step-ups with moderate load.

Someone training at home with minimal equipment might instead emphasize bodyweight squats, hip bridges, single-leg RDLs with a backpack or dumbbell, step-ups on a sturdy chair, and banded walks. For readers interested in how these sessions fit into multi-day splits or broader programs, our fitness and training sections explore different approaches to structuring weekly routines.

Regardless of the exact plan, progression is crucial: gradually increasing resistance, volume, or movement complexity while allowing adequate recovery. Sleep, nutrition, and overall wellness habits-topics explored further in our nutrition and wellness coverage-also influence how effectively the hips and glutes respond to training.

Safety, Progression, and When to Seek Guidance

While hip and glute exercises are generally safe when performed with sound technique, there are important considerations. People with a history of hip, knee, or lower-back issues should approach heavy loading cautiously and may benefit from individualized guidance from a certified strength and conditioning specialist or licensed physical therapist. Reputable organizations such as ACE, the NSCA, and the APTA maintain directories and standards for qualified professionals.

Key safety principles include maintaining a neutral spine during loaded hip hinges, avoiding abrupt jumps in weight, and stopping exercises that cause sharp or worsening pain rather than normal training discomfort. For those new to strength training, starting with bodyweight movements and light external loads can build motor control and confidence before progressing.

It is also useful to remember that strong hips and glutes are not developed in a single "hero" workout but through months and years of consistent, intelligent training. Tracking exercises, loads, and perceived effort in a simple log can help monitor progress and adjust sessions. Combined with a balanced approach to overall health, recovery, and lifestyle, targeted hip and glute work can support performance, resilience, and long-term mobility.

Stronger hips and glutes are achievable for most people, regardless of starting point or equipment. By combining big compound lifts, single-leg and lateral work, targeted activation, and supportive mobility practices, it is possible to turn a common weak link into a genuine strength that benefits sport, daily life, and long-term well-being.

The Link Between Exercise and Blood Sugar Management

Last updated by Editorial team at fitbuzzfeed.com on Sunday 25 October 2026
Article Image for The Link Between Exercise and Blood Sugar Management

The Link Between Exercise and Blood Sugar Management

Physical activity is one of the most powerful, accessible tools for controlling blood sugar-yet its effects are often misunderstood. Many people think of exercise mainly as a way to burn calories, but for blood glucose management, the story is far richer: movement changes how cells use fuel, how sensitive they are to insulin, how the liver releases glucose, and even how the body responds to food hours later. This page explores how exercise affects blood sugar in people with and without diabetes, what types of activity are most effective, and how to use movement strategically-whether your goal is better daily energy, long-term health, or athletic performance.

How the body normally controls blood sugar

In a healthy metabolism, blood glucose is kept within a relatively narrow range, despite large swings in food intake and activity. After eating carbohydrates, they are broken down into glucose, which enters the bloodstream. The pancreas responds by releasing insulin, a hormone that helps move glucose into muscle, fat, and liver cells. Between meals and overnight, another hormone, glucagon, signals the liver to release stored glucose to keep levels stable.

For most people without diabetes, this system keeps blood sugar in check without conscious effort. However, factors such as excess body fat, genetics, certain medications, chronic stress, and inactivity can make cells less responsive to insulin, a state known as insulin resistance. Over time, the pancreas has to work harder to maintain normal levels. When it can no longer keep up, blood sugar rises, leading to prediabetes or type 2 diabetes.

Organizations such as the World Health Organization (WHO) and the International Diabetes Federation (IDF) estimate that hundreds of millions of adults worldwide live with diabetes or prediabetes, many undiagnosed. Against that backdrop, exercise stands out as a non-pharmaceutical intervention with broad, well-documented benefits for blood glucose regulation.

Readers looking for foundational background on metabolic health may also find the broader coverage in our health and wellness sections useful.

What happens to blood sugar when you exercise?

Muscle is the body's largest site of glucose disposal, and exercise turns skeletal muscle into a powerful glucose sink. When muscles contract, they need ATP (energy), which they can generate from stored glycogen (a carbohydrate reserve), blood glucose, and fatty acids.

During exercise, several key changes occur:

Increased glucose uptake by musclesMuscle contractions stimulate glucose transporters (especially GLUT4) to move to the cell surface and pull glucose out of the bloodstream. Importantly, this process can occur independently of insulin, which means exercise can lower blood sugar even in the presence of insulin resistance. The American Diabetes Association (ADA) highlights this as one reason activity is central to diabetes care.

Use of stored glycogenMuscles draw on glycogen stored within them. After exercise, the body prioritizes refilling these glycogen stores, making muscles particularly receptive to glucose and insulin for several hours, and sometimes up to 24-48 hours, after a workout.

Changes in liver glucose outputIn moderate exercise, the liver releases stored glucose to match muscle demand, often keeping blood sugar relatively stable. In high-intensity exercise, stress hormones like adrenaline and cortisol rise, prompting a larger glucose release from the liver-which can temporarily raise blood sugar, especially in people with diabetes.

Improved insulin sensitivity after exerciseAfter a bout of physical activity, muscles become more sensitive to insulin, meaning less insulin is required to move the same amount of glucose into cells. This effect can persist for many hours and is a core reason regular exercise improves average blood sugar and HbA1c over time.

Shifts in fuel useLower-intensity, longer-duration activity tends to use a higher proportion of fat for fuel, while higher-intensity efforts rely more on carbohydrate (glycogen and glucose). Both patterns can be useful for blood sugar control, but they affect timing and magnitude of glucose changes differently.

For people tracking glucose with a continuous glucose monitor (CGM), these effects are often visible in real time: gentle walks may smooth post-meal spikes, while intense intervals might show a short-term rise followed by a longer-term improvement in stability.

Short-term vs long-term effects on blood sugar

The relationship between exercise and blood glucose plays out on two timescales: what happens during and immediately after a workout, and how consistent training changes metabolic health over weeks and months.

In the short term, exercise can:

Lower blood sugar during and after activity as muscles absorb more glucose.

Occasionally raise blood sugar temporarily, especially with very intense or stressful exercise, or if starting with very high glucose levels.

Affect how the body handles the next meal-post-workout meals often produce smaller glucose spikes because muscles are "primed" to store fuel.

In the long term, regular exercise can:

Improve insulin sensitivity, making it easier to maintain normal blood sugar with less insulin (whether produced by the body or injected).

Reduce visceral fat (fat around abdominal organs), which is strongly linked with insulin resistance.

Lower average blood sugar as measured by HbA1c, a marker of roughly three months of glucose control.

Improve cardiovascular health, blood pressure, and lipid levels, which is critical because cardiovascular disease is a leading complication of diabetes, as emphasized by the Centers for Disease Control and Prevention (CDC) and National Institutes of Health (NIH).

From a training perspective, this means that even if a single workout feels modest, its cumulative impact on glucose control can be substantial when repeated consistently. Our training coverage often underscores this point: consistency usually beats intensity for long-term health.

Aerobic exercise: the foundation for blood sugar control

Aerobic or "cardio" exercise-activities such as brisk walking, cycling, swimming, running, or dancing-has been studied extensively in the context of blood sugar management. Guidelines from bodies like the American College of Sports Medicine (ACSM) and the ADA recommend at least 150 minutes per week of moderate-intensity aerobic activity for most adults, ideally spread across at least three days.

For blood sugar, aerobic exercise tends to:

Reduce post-meal spikes when performed after eating, by accelerating glucose uptake into muscles. A 10-20 minute walk after meals can measurably blunt glucose peaks in many people with insulin resistance or type 2 diabetes.

Lower fasting glucose when performed regularly, by improving insulin sensitivity and reducing liver glucose overproduction.

Improve cardiorespiratory fitness, which is associated with lower risk of type 2 diabetes and better outcomes in those who already have it.

Moderate-intensity efforts-where breathing is faster but conversation is still possible-seem particularly effective for day-to-day glucose stability. They are also more sustainable for many people than high-intensity work, making it easier to meet weekly activity targets.

For readers looking to build a structured routine, our fitness and physical sections often feature practical cardio plans adaptable for different fitness levels.

Strength training and insulin sensitivity

Resistance training-using free weights, machines, resistance bands, or bodyweight-plays a complementary role. While aerobic exercise is often emphasized in diabetes guidelines, strength training is increasingly recognized as equally important.

Key mechanisms include:

Increased muscle mass: Muscle tissue is metabolically active and a major site for glucose disposal. More muscle generally means a larger "sink" for glucose, which can help stabilize levels over time.

Improved insulin signaling: Regular resistance training enhances how muscle cells respond to insulin, further improving glucose uptake.

Changes in body composition: Strength work can reduce fat mass (especially when combined with appropriate nutrition) and increase lean mass, both of which are linked to better insulin sensitivity.

The ADA and ACSM recommend at least two, and preferably three, non-consecutive days per week of resistance training for people with type 2 diabetes or prediabetes, targeting major muscle groups. Sessions do not have to be long; even 20-30 minutes of focused work can confer benefits.

From a practical standpoint, combining strength and cardio within a weekly plan tends to yield the best outcomes for metabolic health. Readers interested in integrating resistance training with nutrition strategies can explore more in our nutrition coverage.

High-intensity intervals, sports, and blood sugar swings

High-intensity interval training (HIIT) and many competitive sports (such as football, basketball, or racket sports) alternate bursts of intense effort with periods of rest or lighter activity. These formats can be time-efficient and improve fitness quickly, but their effects on blood sugar can be more complex.

During intense bursts, the body releases adrenaline and cortisol, which stimulate the liver to release glucose rapidly. In people without diabetes, the pancreas usually compensates with a surge of insulin, and blood sugar remains within a normal range. In people with type 1 or type 2 diabetes, especially those using insulin, this hormonal surge can lead to a temporary rise in glucose during or immediately after exercise.

Despite this short-term bump, research summarized by organizations such as Diabetes UK (Diabetes UK) suggests that HIIT, when appropriately programmed, can still improve overall insulin sensitivity and reduce average blood sugar. However, it may require more careful monitoring and adjustment of medication or carbohydrate intake, particularly for those using insulin or sulfonylureas.

For athletes with diabetes, individualized strategies-often developed with support from healthcare teams-are essential. That may include adjusting insulin doses before training or competition, planning carbohydrate timing, and using CGM data to spot patterns. Our sports section occasionally highlights case studies and practical approaches used by active people managing diabetes in competitive environments.

How often and how much exercise is needed?

Evidence from large observational studies and intervention trials supports several broad principles:

Frequency matters: Because the insulin-sensitizing effects of a single exercise session can fade within 24-72 hours, most guidelines recommend avoiding more than two consecutive days without activity. Even short, frequent bouts can be effective.

Total weekly volume counts: Around 150 minutes per week of moderate-intensity aerobic activity is a common target, with benefits continuing to increase up to about 300 minutes for many people, according to the WHO and ACSM.

Mixing intensities can help: Combining moderate-intensity steady efforts with occasional higher-intensity intervals or more vigorous sessions can further improve fitness and metabolic markers, as long as it is safe and sustainable for the individual.

Strength work is not optional: At least two days per week of resistance training significantly enhances the effects of aerobic exercise on glucose control and long-term health.

For people with prediabetes or type 2 diabetes who are currently inactive, even modest increases in activity-such as 10 minutes of walking after each main meal-can begin to shift blood sugar patterns. Over time, those small changes can evolve into more structured programs aligned with broader lifestyle goals.

Exercise timing: before or after meals?

The timing of physical activity relative to meals can strongly influence blood sugar responses. Several practical patterns have emerged:

Post-meal walking: Light to moderate walking starting within 15-30 minutes after eating can significantly blunt post-meal glucose spikes, especially after carbohydrate-rich meals. This strategy is often recommended by diabetes educators and is supported by clinical studies.

Pre-meal exercise: Exercising before a meal, particularly at moderate or higher intensity, can improve insulin sensitivity and reduce the glucose rise from the subsequent meal. However, in people using insulin or certain medications, pre-meal exercise may increase the risk of low blood sugar if doses are not adjusted.

Bedtime and overnight considerations: Evening exercise can lower blood glucose for several hours afterward. For people prone to overnight hypoglycemia, especially those with type 1 diabetes, this can require careful planning of carbohydrate intake and insulin dosing.

The "best" timing often depends on individual routines, medication regimens, and personal preference. From a purely metabolic standpoint, spreading activity across the day and including some movement after meals appears particularly helpful for many people.

Special considerations for type 1 and type 2 diabetes

While the physiological principles of exercise and blood sugar are broadly similar, practical management differs between type 1 and type 2 diabetes.

For type 1 diabetes:

The pancreas produces little or no insulin, so all insulin is delivered via injections or pumps. Exercise can increase the risk of hypoglycemia (low blood sugar), sometimes during activity and sometimes several hours later.

Strategies often include adjusting insulin doses before planned exercise, consuming additional carbohydrates, and closely monitoring glucose before, during, and after workouts.

Intense anaerobic or interval exercise can cause temporary hyperglycemia due to stress hormones, which may require correction with insulin after activity, as advised by a healthcare team.

For type 2 diabetes:

Many individuals still produce insulin but are insulin resistant. Exercise primarily improves insulin sensitivity and can reduce the need for medication over time.

Those using insulin or insulin-stimulating medications (like sulfonylureas) still face some risk of hypoglycemia during or after exercise, especially if doses are not adjusted.

For people managed with lifestyle changes alone or with medications that do not cause hypoglycemia (such as metformin, many GLP-1 receptor agonists, or SGLT2 inhibitors), the risk of exercise-induced low blood sugar is generally lower, but still possible in certain circumstances.

Organizations like the ADA, Diabetes UK, and national health services such as NHS England (NHS) provide patient-oriented guidance on adjusting exercise plans to individual treatment regimens. Collaboration with healthcare professionals is especially important when starting or intensifying an exercise program.

Nutrition, hydration, and exercise-related glucose control

Exercise does not operate in isolation; what and when a person eats significantly shapes blood sugar responses to activity.

Key points include:

Carbohydrate quality and quantity: Higher-fiber, minimally processed carbohydrate sources (such as whole grains, legumes, fruits, and vegetables) generally produce slower, smaller glucose rises than refined carbohydrates and sugary drinks. Combining these with protein and healthy fats can further smooth the curve.

Pre-exercise fueling: For longer or more intense sessions, some carbohydrate intake beforehand may be necessary to prevent low blood sugar, particularly for those using insulin. The exact amount depends on medication, recent meals, and exercise intensity.

Intra-workout carbs: During prolonged endurance exercise (e.g., long runs or rides), additional carbohydrates may be needed to maintain performance and prevent hypoglycemia. Sports nutrition strategies often need adaptation for individuals with diabetes.

Hydration and electrolytes: Dehydration can affect blood viscosity and may influence glucose readings and perceived effort. People with diabetes are also more susceptible to dehydration when blood sugar is high. Regular fluid intake and, for long sessions, appropriate electrolytes can support safer performance.

Our nutrition and wellness pages frequently explore how food choices interact with training and metabolic health, including for people managing diabetes.

Safety tips for exercising with blood sugar concerns

For individuals with diabetes, prediabetes, or suspected glucose irregularities, several safety principles are widely recommended by organizations such as the ADA, IDF, and national health agencies:

Consult a healthcare professional before major changes in activity level, especially if you have complications such as cardiovascular disease, neuropathy, or retinopathy.

Monitor blood sugar around exercise when possible, particularly in the early stages of a new program. Patterns over several sessions are often more informative than a single reading.

Be aware of hypoglycemia signs: shakiness, sweating, confusion, rapid heartbeat, and sudden fatigue. Always have a quick-acting carbohydrate source available if you are at risk.

Check feet and footwear regularly, especially for those with neuropathy or circulation issues, to avoid blisters, ulcers, or injuries that may go unnoticed.

Progress gradually: jumping abruptly from inactivity to very intense exercise can increase injury risk and complicate glucose management.

For many people, especially those new to structured exercise, starting with accessible activities such as walking, light cycling, or water-based exercise can be a safe gateway to more varied training over time. Additional guidance on building sustainable routines is available across our fitness and training content.

Using technology and data to personalize your approach

Modern tools-from simple step counters to continuous glucose monitors-allow individuals to see how specific activities affect their own blood sugar. Wearables from major tech and fitness brands and CGM devices approved by regulators such as the U.S. Food and Drug Administration (FDA) have made it easier to experiment with different exercise types, timings, and intensities.

While not everyone needs advanced technology, those who do use it can:

Compare blood sugar responses to different workouts, such as walking vs intervals.

Test the impact of post-meal walks vs pre-meal sessions.

Adjust carbohydrate intake before and after exercise based on observed patterns.

Share data with healthcare professionals to refine treatment and training plans.

Independent health and science journalism from outlets like Harvard T.H. Chan School of Public Health (Harvard) and major news organizations such as the BBC (BBC) often provide accessible summaries of emerging research on exercise, glucose, and wearable tech, which can complement formal medical advice.

Bringing it together: movement as daily glucose medicine

Across large clinical trials, public health guidelines, and real-world experience, a consistent picture emerges: regular physical activity is one of the most effective non-drug strategies for managing blood sugar, reducing the risk of type 2 diabetes, and improving outcomes for people who already live with it. The most impactful approach is usually:

A foundation of frequent, moderate-intensity aerobic activity, such as brisk walking, cycling, or swimming.

Twice-weekly (or more) strength training to build and maintain muscle mass and improve insulin sensitivity.

Strategic timing of movement around meals, particularly incorporating short walks after eating.

Attention to nutrition, hydration, and safety, tailored to individual health status and medications.

A focus on consistency over perfection, recognizing that even small, repeated bouts of movement can meaningfully shift blood sugar patterns and long-term health trajectories. For those beginning this journey, starting small-perhaps a 10-minute walk after one meal per day-and building gradually is often more realistic and sustainable than aiming for an idealized training plan on day one. Over time, that modest habit can evolve into a comprehensive lifestyle that supports not just blood sugar control, but overall fitness, energy, and quality of life.

How Resistance Bands Support Full-Body Strength Training

Last updated by Editorial team at fitbuzzfeed.com on Saturday 24 October 2026
Article Image for How Resistance Bands Support Full-Body Strength Training

How Resistance Bands Can Power a True Full-Body Strength Workout

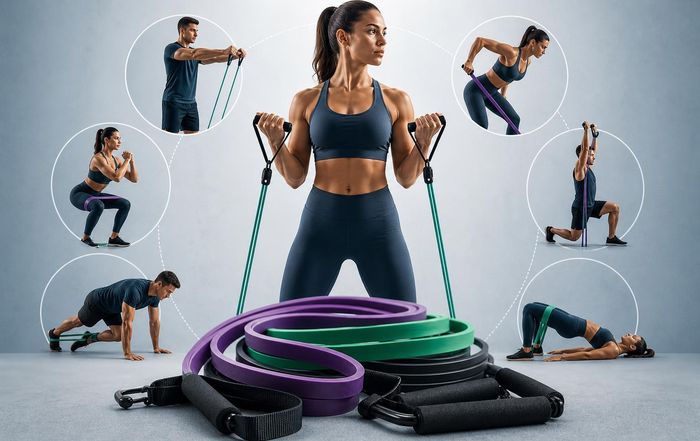
Resistance bands have quietly moved from rehab clinics and hotel gyms into serious strength programs, from beginners at home to elite athletes. They are light, inexpensive, and portable-but they can also provide demanding resistance that challenges muscles through a full range of motion. For people who want to build strength without a full rack of weights, understanding how bands actually work and how to program them for full-body training is crucial.

This guide looks at the science behind resistance bands, how they compare to free weights, and how to build a balanced head-to-toe program using little more than a set of bands and some space on the floor.

What Resistance Bands Actually Do to Your Muscles

Resistance bands create tension through elastic stretch. As you pull a band farther, the resistance increases, a property called variable resistance. Unlike a dumbbell that weighs the same at every point in a lift, bands become more challenging as they lengthen, often matching the part of the movement where you are naturally stronger (for example, near the top of a squat or press).

Research from organizations such as the American Council on Exercise (ACE) and peer-reviewed studies accessible via PubMed (NCBI) suggest that, when resistance is matched, training with elastic bands can stimulate similar strength gains to traditional free weights for many exercises. Bands load muscles through both concentric (lifting) and eccentric (lowering) phases, and they can be anchored in multiple directions to challenge stabilizing muscles that sometimes contribute less during machine-based training.

Because bands are relatively low impact and allow natural joint paths, they are widely used in physical therapy and sports rehab. Organizations such as the American Physical Therapy Association (APTA) note that elastic resistance is useful for restoring strength, mobility, and neuromuscular control after injury. For general fitness, this translates into a tool that can build strength while being joint-friendly and adaptable to different mobility levels.

Readers who want to place band work in a broader training plan can explore strength-focused guidance in the site's training and physical fitness sections.

Bands vs. Weights: How Do They Compare for Strength?

For full-body strength, the key question is whether bands can truly replace or at least meaningfully stand in for barbells and dumbbells. The answer is nuanced.

Studies summarized by organizations like NSCA (https://www.nsca.com/) and ACE have shown that:

When total resistance is comparable, elastic bands can produce similar improvements in strength and muscle activation for many upper- and lower-body movements.

Bands are especially effective when combined with free weights, adding variable resistance that increases load where the body is strongest (for example, attaching bands to a barbell bench press or squat).

For maximal strength and power in advanced athletes, heavy free-weight lifting is still central, but bands remain useful as an accessory or for speed and control work.

For everyday lifters and people training at home, bands can provide enough resistance to build muscle and strength, particularly when using thicker loop bands and training close to muscular fatigue. They also make it easy to adjust difficulty mid-set by stepping farther from the anchor, changing stance width, or shortening the band.

Compared with machines, bands encourage more stabilization and balance. They are less precise in terms of exact load, but that is rarely a limitation for general fitness. For those who enjoy combining tools, a hybrid approach-bands plus bodyweight, or bands plus a few dumbbells-can offer a highly effective and versatile strength setup. Readers exploring mixed-modality training may also find useful context in our fitness and sports coverage.

Why Bands Work Well for Full-Body Training

A full-body strength routine needs to cover all major movement patterns: pushing, pulling, hinging, squatting, lunging, rotating, and bracing. Resistance bands can train each of these patterns from multiple angles, which is why they are so useful for comprehensive workouts.

Loop bands, tube bands with handles, and mini-bands can collectively cover:

Upper-body horizontal and vertical pushes (presses, push-ups, overhead presses)

Upper-body pulls (rows, pulldowns, face pulls)

Hip-dominant movements (deadlift variations, hip hinges, pull-throughs)

Knee-dominant movements (squats, split squats, lunges)

Core and rotational work (Pallof presses, anti-rotation holds, wood-chop patterns)

Glute activation and lower-body accessory work (lateral walks, clamshells, hip abduction)

Because bands can be anchored at different heights, they allow angles that are difficult with free weights alone, especially for horizontal and diagonal pulls or presses in small spaces. This makes them particularly practical for home or travel workouts when access to a full gym is limited.

For people who prioritize joint health and mobility, the continuous tension of bands also pairs well with dynamic warm-ups and mobility drills. Resources from organizations such as Exos (https://www.teamexos.com/) and USA Weightlifting (https://www.usaweightlifting.org/) often integrate band work for shoulder and hip preparation before heavier lifting sessions.

Types of Resistance Bands and When to Use Each

Not all bands behave the same way. Knowing the main types helps in choosing the right tool for each exercise and body part.

Long loop bands (often called power bands) are closed loops typically ranging from very light to extremely heavy resistance. They are highly versatile: useful for squats, deadlifts, assisted pull-ups, rows, presses, hip work, and attaching to bars or sturdy anchors. For full-body strength, a small set of loop bands in different thicknesses can cover most needs.

Tube bands with handles mimic cable machines. They are particularly comfortable for pressing and rowing because the handles allow a natural grip and reduce friction. Many sets include door anchors, making it easy to set up horizontal and vertical pulling in a small apartment or hotel room. When planning structured home programs, pairing tube bands with bodyweight movements can create a complete routine, similar in spirit to cable-based gym workouts.

Mini-bands are smaller loops, often used around the knees, ankles, or wrists. They shine in glute activation, hip stability work, lateral walks, and shoulder stability drills. They are usually not the primary resistance for big compound lifts but are valuable accessories to improve movement quality and address weak links.

Flat therapy bands are lighter latex strips commonly used in rehabilitation. They are ideal for very light resistance, early-stage rehab, or joint-friendly shoulder and rotator cuff work. Organizations such as the National Institutes of Health (NIH) and Mayo Clinic (https://www.mayoclinic.org/) often highlight elastic bands of this type in patient-friendly exercise guidance.

For a balanced full-body training kit at home, many coaches recommend at least three to five resistance levels of long loop or tube bands, plus one or two mini-bands. This allows progression over time and lets different muscle groups be challenged appropriately.

Building a Full-Body Resistance Band Workout

A full-body strength session with bands should still respect the same principles as any other strength program: train the big movement patterns, work through full ranges of motion, and use enough resistance and volume to challenge the muscles.

One simple structure is to organize the workout around movement patterns rather than individual muscles. A sample session might include:

A squat or lunge pattern

A hip hinge or deadlift pattern

A horizontal push

A horizontal pull

A vertical push

A vertical pull

A core anti-rotation or anti-extension exercise

Optional accessory work for glutes, shoulders, or calves

For example, a band-only session could look like this:

Band front squats or band-resisted goblet squats

Band Romanian deadlifts or pull-throughs

Standing band chest press or band-resisted push-ups

One- or two-arm band rows

Standing overhead press with bands

Band lat pulldown or straight-arm pulldown anchored high

Pallof press or band dead bug for the core

Mini-band lateral walks or hip abduction as finisher

Most people will benefit from working in the 8-15 repetition range for 2-4 sets per exercise, adjusting band thickness so that the last few reps are challenging but technically solid. Those interested in more specific set-and-rep schemes can explore additional programming ideas in our training and health sections.

Programming for Strength, Muscle, and General Fitness

How bands are used in a weekly plan matters as much as the exercises themselves. The World Health Organization (WHO) recommends that adults perform muscle-strengthening activities involving major muscle groups on at least two days per week. For those using bands, that can translate into:

Two to three full-body band sessions weekly for general health and basic strength.

Three to four weekly sessions (often split into upper- and lower-body days) for more advanced muscle and strength goals, with attention to recovery.

For strength emphasis, choose thicker bands and lower rep ranges (for example, 6-10 reps), focusing on controlled, powerful movements and longer rest periods. For muscle growth and general conditioning, moderate resistance and higher reps (8-15 or even 15-20 for some accessory work) can be effective, especially when sets are taken close to muscular fatigue.

Progression with bands can be managed by:

Moving up to a thicker band or doubling bands.

Stepping farther from the anchor to increase stretch.

Shortening the band by wrapping it around the hands or anchor.

Adding sets or reps over time.

Slowing the eccentric (lowering) phase to increase time under tension.

Because band resistance increases toward the end of the range of motion, lifters should pay particular attention to joint position and alignment in those final degrees. This is especially important for shoulders, elbows, and knees, which can be stressed if form breaks down. Our wellness coverage often emphasizes this interplay between training intensity and joint health.

Technique, Safety, and Common Mistakes

While bands are generally safe and accessible, they are not risk-free. Good technique and basic equipment checks make a difference.

The first step is inspecting bands regularly. Over time, latex can crack, dry, or thin, especially if exposed to sunlight or sharp surfaces. A sudden snap under tension can cause minor injuries or at least ruin a workout. Reputable manufacturers and organizations such as Consumer Product Safety Commission (CPSC) recommend replacing bands that show visible wear, nicks, or significant loss of elasticity.

Anchoring is another crucial factor. Door anchors should be used as instructed and placed on the hinge side when possible so the door cannot be pulled open. When looping bands around posts, bars, or furniture, ensure the anchor point is solid, stable, and not sharp. Avoid anchoring around objects that could tip or move, such as lightweight chairs or freestanding lamps.

From a technique standpoint, common mistakes include:

Letting bands "snap" back instead of controlling the eccentric phase.

Standing too close to the anchor, which reduces effective resistance and range of motion.

Using bands that are too heavy, causing compensations like arching the back or shrugging shoulders.

Allowing knees to collapse inward during squats or lunges with band resistance.

Overloading small joints (wrists, elbows, shoulders) with awkward angles.

As with any strength training, breathing and bracing matter. Bracing the core and maintaining neutral spine alignment help protect the lower back, especially in hinge patterns and overhead pressing. People with existing joint or cardiovascular conditions should follow medical guidance; organizations such as the American Heart Association (https://www.heart.org/) and NHS in the UK (https://www.nhs.uk/) provide general exercise-safety advice that can be adapted to band training.

Combining Bands with Other Training Methods

Resistance bands do not have to be an all-or-nothing choice. Many lifters use them to complement other tools:

With bodyweight: Adding a band to push-ups, squats, or glute bridges increases resistance without needing weights.

With dumbbells or barbells: Bands can be looped around bars or held alongside dumbbells to create accommodating resistance, making the top of the movement harder and encouraging explosive intent.

With cardio: Band circuits can be woven into interval sessions for time-efficient conditioning, alternating short bursts of band strength work with low-impact cardio like brisk walking or cycling.

This versatility is particularly appealing for people who balance strength training with endurance sports, recreational leagues, or busy schedules. Those exploring broader performance and conditioning approaches can find additional ideas in our fitness, nutrition, and lifestyle sections.

Who Benefits Most from Full-Body Band Training?

While almost anyone can use resistance bands, certain groups may find them especially valuable.

Beginners often appreciate the low intimidation factor and the ability to start with very light resistance. Bands allow gradual exposure to strength training patterns without immediately handling heavy weights, which can be reassuring while learning technique. For people returning after a long break or building confidence after injury, this can be a practical first step.

Travelers and people with limited space benefit from the portability and compact storage. A small bag of bands can turn a hotel room or living room into a functional gym, making it easier to stay consistent. This is particularly relevant for those whose work, events, or family life make regular gym visits difficult.

Older adults and individuals with joint sensitivity may find bands more forgiving than some free-weight or machine setups. When combined with balance and mobility work, band-based full-body sessions can help maintain strength and independence, aligning with recommendations from organizations like the Centers for Disease Control and Prevention (CDC) on physical activity and healthy aging.

At the other end of the spectrum, athletes and serious lifters use bands to target weak points, improve bar speed, or add variety to accessory work. For example, band face pulls, external rotations, and hip stability drills are staples in many high-performance programs, including those highlighted by organizations such as USA Track & Field (https://www.usatf.org/) and professional strength coaches.

Making Bands a Sustainable Part of Your Routine

For resistance bands to truly support full-body strength training, they need to be woven into a consistent, progressive routine rather than used sporadically. That means choosing realistic training days, tracking basic progression (like adding reps, resistance, or extra sets over time), and pairing training with supportive lifestyle habits such as sleep and nutrition.

A practical starting point is two full-body band sessions per week, each covering the major movement patterns, with a third optional day for mobility, lighter accessory work, or technique practice. As strength and confidence grow, some people will transition to heavier free-weight work while keeping bands for warm-ups, travel, or joint-friendly days. Others will continue to rely on bands as their main strength tool, adjusting resistance and complexity to stay challenged.

Ultimately, resistance bands are not a gimmick; they are a flexible form of elastic resistance that, when used thoughtfully, can build meaningful strength across the entire body. Whether they serve as a bridge into strength training, a portable gym in a backpack, or a permanent piece of a more complex program, their real value lies in how consistently and intelligently they are used.

A Practical Guide to Healthy Eating on Night Shifts

Last updated by Editorial team at fitbuzzfeed.com on Friday 23 October 2026
Article Image for A Practical Guide to Healthy Eating on Night Shifts

A Practical Guide to Healthy Eating on Night Shifts!

Working through the night can disrupt almost every instinct the body has about food, energy, and rest. Hunger hits at odd times, vending machines look tempting at 3am, and it can feel impossible to balance performance, long-term health, and genuine fatigue. Yet with some planning and realistic strategies, night-shift workers can eat in ways that support alertness, metabolic health, and recovery without needing a perfect diet or elaborate cooking.

This yummy guide brings together what is known from sleep and nutrition research, alongside practical tactics that work in real-world shift patterns. It is aimed at people who regularly work nights in healthcare, emergency services, manufacturing, transport, hospitality, security, and other 24-hour roles.

How Night Shifts Disrupt Hunger, Digestion, and Metabolism

Human biology is tuned to a roughly 24-hour circadian rhythm, with hormones, digestion, and body temperature following a daily pattern. At night, the body expects sleep, not food. Hormones that regulate appetite and blood sugar behave differently in the small hours, and this has consequences for how the body handles what is eaten.

Research from organizations such as the National Sleep Foundation and National Institutes of Health shows that circadian misalignment-being awake and eating when the internal clock expects sleep-is linked to higher risk of weight gain, type 2 diabetes, cardiovascular disease, and digestive problems. Studies suggest that glucose tolerance and insulin sensitivity are worse at night, meaning the same meal can cause a higher blood sugar spike at 2 a.m. than at 2 p.m. For people already at risk of diabetes or metabolic syndrome, this effect can be significant.

Digestion also slows at night. The gut produces less digestive enzyme activity, the stomach empties more slowly, and the colon's movement changes. Heavy or high-fat meals in the middle of the night are therefore more likely to cause heartburn, bloating, and discomfort, which can further impair sleep when you finally get home. Night work is associated with higher rates of gastrointestinal complaints, including reflux and irritable bowel-type symptoms, according to data summarized by the World Health Organization and various occupational health bodies.

Understanding this physiology matters because it explains why many night-shift workers feel simultaneously ravenous and sluggish, or why the same foods that feel fine at lunch can cause distress at 4 a.m. Rather than fighting biology, the goal is to work with it: eat in a way that respects the body's preference for daytime calories while still providing enough fuel to stay alert and safe on the job.

Big Picture Strategy: Anchor Your "Day" With Two Main Meals

One of the most useful approaches is to think in terms of an "anchor" meal pattern that stays relatively stable across the week, even when shifts rotate. Instead of building your entire eating schedule around the night shift, you keep two main meals at roughly consistent clock times, then add a light meal or snack during the shift.

A practical framework many night-shift workers find realistic:

A main meal before the shift (often framed as "dinner," even if it is eaten at 6-8 p.m.).

A lighter, balanced meal or two small snacks during the shift.

A small snack after the shift if needed, then sleep.

This pattern keeps most of your total daily calories closer to daylight hours, which better matches circadian biology, while still acknowledging that some food is needed to maintain focus overnight. It also reduces the temptation to graze constantly, a habit strongly associated with excess calorie intake on nights.

For readers wanting to align this approach with training or sport, planning around your workouts becomes important. Scheduling resistance or conditioning sessions before your main pre-shift meal can help preserve muscle and improve insulin sensitivity. Our training coverage at Training and Physical offers broader guidance on integrating exercise with unusual schedules.

What to Eat Before a Night Shift

The pre-shift meal is the nutritional foundation of the night. Its job is to provide steady energy, support concentration, and reduce the need for heavy eating during the shift. Ideally, it should be eaten 1-3 hours before starting work to allow some digestion before the most intense part of the night.

A helpful structure is:

A good source of lean or moderate-fat protein.

High-fibre, slow-digesting carbohydrates.

Healthy fats in modest amounts.

Vegetables or salad for fibre and micronutrients.

Protein options might include poultry, fish, eggs, tofu, lentils, or Greek-style yogurt. Slow carbohydrates could be oats, brown rice, quinoa, whole-grain bread, or potatoes with their skin. Healthy fats might come from olive oil, nuts, seeds, or avocado. A plate of salmon, roasted vegetables, and quinoa, or a chickpea and vegetable curry with brown rice, offers a mix that digests steadily without being overly heavy.

This is also a good time to pay attention to hydration. Starting the shift well-hydrated is more effective than trying to "catch up" with large amounts of fluid later, which may just send you repeatedly to the bathroom. Guidance from organizations like the European Food Safety Authority and Academy of Nutrition and Dietetics suggests that total daily fluid needs vary by body size, climate, and activity, but a simple rule for many adults is to aim for pale-yellow urine and to sip water consistently rather than in large bursts.

Caffeine timing is another key consideration. A moderate amount of caffeine with or shortly after the pre-shift meal can improve alertness and reaction time, as shown in research from the U.S. Food and Drug Administration and Mayo Clinic. However, heavy caffeine intake late in the shift can delay sleep and worsen overall recovery. Many experts recommend setting a personal "caffeine curfew" 4-6 hours before your planned bedtime.

Smart Eating During the Night: Light, Regular, and Purposeful

Once the shift is underway, the temptation is often to rely on whatever is quick and available-usually sugary snacks, fried foods, and energy drinks. These options can cause rapid blood sugar swings, brief bursts of energy followed by crashes, and long-term metabolic strain. A more sustainable strategy is to think of on-shift eating as targeted refuelling: small, purposeful portions that support performance without overwhelming digestion.

For most people, one light meal or two smaller snacks spaced out over the shift works better than a single large "midnight dinner." The focus should be on protein and fibre-rich carbohydrates, with some healthy fat, but not so much that the meal feels heavy or greasy. Examples include a whole-grain wrap with chicken or hummus and salad, yogurt with fruit and nuts, or a bean-based salad brought from home. These kinds of foods provide sustained energy, are less likely to cause reflux, and support muscle maintenance if you are also training.

From a performance perspective, complex carbohydrates are valuable because the brain relies heavily on glucose. However, the circadian reduction in glucose tolerance at night means that large portions of refined carbs-white bread, pastries, sweets-are best minimized. Pairing carbohydrates with protein and fibre helps slow absorption and moderate blood sugar spikes, a principle echoed in resources from groups like Diabetes UK and the American Diabetes Association.

It also helps to plan your highest-risk period. Many shift workers report the biggest slump between 3 a.m. and 5 a.m., when core body temperature is lowest and sleep drive is strongest. A small, balanced snack 30-60 minutes before this window-such as a banana with a handful of nuts, or whole-grain crackers with cottage cheese-can provide just enough energy to bridge the dip without provoking a crash later.

What (and When) to Eat After the Shift

What you eat after clocking off can either support restorative sleep or make it harder to wind down. The body is usually tired but still digesting whatever was eaten during the shift. A very large, heavy meal at this point can prolong digestion, increase the risk of reflux when lying down, and interfere with sleep architecture.

If you are genuinely hungry, a small, balanced snack is usually better than skipping food entirely or eating a full "breakfast feast." Options such as oatmeal with a little milk and fruit, a small omelette with vegetables, or yogurt with seeds and berries offer some protein and complex carbohydrates without being overly rich. People who train after a night shift may need more calories and protein, but even then, keeping fat content moderate can reduce digestive burden before sleep.

Some night-shift workers find that a small carbohydrate-focused snack, such as toast with nut butter or a bowl of cereal, helps them feel drowsy. Carbohydrates can increase tryptophan availability in the brain, which is involved in serotonin and melatonin production, though the effect is modest. Guidance from sleep organizations such as the Sleep Foundation and American Academy of Sleep Medicine emphasizes that overall sleep hygiene-darkness, cool temperature, and a consistent wind-down routine-is more important than specific foods, but gentle, familiar snacks can play a supporting role.

Alcohol is best avoided as a post-shift sleep aid. While it may shorten sleep onset, it fragments sleep, reduces REM and deep sleep, and can worsen breathing issues. Over time, this can compound the already elevated health risks associated with night work. Hydrating with water, herbal tea, or milk and keeping caffeine intake low in the final hours of the shift will usually support better recovery.

Managing Caffeine, Energy Drinks, and Sugary Snacks

Caffeine is a double-edged tool for night-shift workers. In moderate doses, it improves alertness, reaction time, and vigilance-critical for safety in many occupations. However, high or poorly timed doses can impair sleep, increase anxiety, and mask underlying exhaustion. Organizations like the FDA and Health Canada commonly cite up to 400 mg of caffeine per day as a general upper limit for healthy adults, roughly equivalent to four small cups of brewed coffee, although sensitivity varies widely.

Energy drinks complicate the picture further. Many combine high doses of caffeine with sugars and other stimulants. While they may feel effective in the short term, repeated use is associated with elevated blood pressure, sleep disturbance, and sometimes palpitations, particularly when consumed rapidly or in combination with other stimulants. For night-shift workers, a more measured approach is to rely on smaller, spaced-out doses of caffeine from coffee or tea, paired with water, and to avoid high-sugar beverages that can cause rapid glucose spikes.

Setting a clear caffeine cut-off time is one of the simplest ways to protect sleep. If you aim to sleep at 9 a.m., stopping caffeine by around 3-5 a.m. will reduce the chance of residual stimulation; some people may need an even earlier deadline. It can help to gradually taper rather than abruptly stop-switching from coffee to tea, then to decaf or herbal options.

Sugary snacks can feel almost irresistible at low-energy moments. Instead of relying on willpower alone, it is more effective to change the environment and defaults. Bringing your own snacks-fruit, nuts, yogurt, whole-grain crackers, boiled eggs, or homemade trail mix-reduces the need to visit vending machines. If your workplace has a say in food provision, advocating for healthier options in canteens and vending machines can make a real difference; public-health agencies such as Public Health England and the Centers for Disease Control and Prevention have workplace nutrition toolkits that employers can draw on.

Meal Prep Strategies That Actually Work on Rotating Shifts

For many night-shift workers, knowing what to eat is not the main problem; it is finding the time, energy, and structure to make it happen. Meal preparation can sound like one more chore on an already overloaded schedule, but a few simple systems can reduce stress and improve consistency.

Batch cooking is often the most realistic starting point. Preparing a large pot of chilli, soup, curry, or grain-based salad on a day off, then portioning it into individual containers, gives you grab-and-go meals for several shifts. Choosing recipes that freeze well-stews, casseroles, cooked legumes, and many whole-grain dishes-extends flexibility, allowing you to build a small "shift freezer" of ready meals. This can be particularly valuable for workers with unpredictable overtime or call-outs.

Another strategy is to assemble "snack kits" that live in your work bag or locker. These might include unsalted nuts, low-sugar granola bars, whole-grain crackers, shelf-stable milk or soy drinks, and packets of tuna or hummus that do not require refrigeration until opened. Having these defaults available makes it easier to avoid less healthy options when hunger appears unexpectedly. Our Nutrition and Wellness sections regularly explore portable food ideas that can be adapted for shift work.

Rotating shifts add complexity because mealtimes and sleep windows keep changing. One approach is to maintain a consistent "anchor" breakfast or first meal time on days off, then adjust only the timing of later meals as shifts rotate. Another is to gradually shift meal times by 1-2 hours in the days leading up to a new rotation, allowing the body to adapt more gently. Occupational-health specialists and sleep researchers, including those referenced by the National Institute for Occupational Safety and Health, often emphasize that even partial regularity in meals and sleep can improve how people feel.

Finally, it can help to lower the bar for what counts as "good enough" meal prep. A store-bought rotisserie chicken paired with microwaveable frozen vegetables and a packet of pre-cooked brown rice is still a balanced meal that beats fast food. Pre-washed salad mixes, canned beans, and frozen berries are legitimate tools, not shortcuts to feel guilty about.

Balancing Training, Body Composition, and Night Work

Many people working nights are also trying to gain strength, maintain muscle, or manage body weight. Night shifts can make this more challenging but not impossible. The key is to align training, nutrition, and recovery in a realistic way rather than chasing idealized routines designed for 9-5 schedules.

From a body-composition perspective, total weekly energy balance still matters most. However, night work can alter appetite hormones such as leptin and ghrelin, often increasing cravings for high-calorie foods and reducing satiety. Studies summarized by groups like Harvard T.H. Chan School of Public Health indicate that sleep restriction and circadian disruption can lead to increased caloric intake, particularly from snacks. Recognizing this tendency can help in planning: building in satisfying, protein-rich meals and planned snacks may reduce the urge to overeat later.

For strength and performance, timing protein intake becomes important. Distributing protein across the day-aiming for roughly 20-40 grams per meal or snack, depending on body size-supports muscle repair and growth. If you train before a night shift, a protein-rich pre-shift meal and a lighter protein snack during the shift can cover most needs. If you train after a shift, a recovery meal with both protein and carbohydrates will be helpful, but keeping fat moderate can protect sleep.

Hydration and electrolytes also matter, especially for physically demanding jobs or hot environments. Sipping water regularly, using low-sugar electrolyte drinks when sweating heavily, and not relying solely on caffeinated beverages can help maintain performance. Readers interested in sports-specific guidance can explore our Sports and Fitness coverage, which often addresses fuelling and recovery strategies.

Protecting Long-Term Health: Weight, Heart, and Metabolic Risks

Night-shift work is associated with increased risk of obesity, type 2 diabetes, cardiovascular disease, and some cancers, according to large cohort studies reviewed by the WHO and national health agencies such as the NHS and Centers for Disease Control and Prevention. Not every individual will experience these outcomes, but the statistical risk is higher, and nutrition is one of the levers that can reduce harm.

Several patterns appear protective:

Keeping most daily calories to the "biological daytime," even if that overlaps with afternoon or early evening.

Emphasizing whole foods: vegetables, fruits, whole grains, legumes, nuts, seeds, and minimally processed protein sources.

Limiting added sugars, especially in beverages and snacks consumed at night.

Choosing unsaturated fats (olive oil, nuts, seeds, oily fish) over trans fats and excessive saturated fat.

Avoiding large, high-fat meals in the early morning hours.

These principles align with broader evidence-based dietary patterns, such as the Mediterranean-style diet, which has been linked to reduced cardiovascular and metabolic risk in multiple populations. While it may not be possible to follow such patterns perfectly on every shift, moving in that direction-one meal, one snack at a time-can have cumulative benefits.

It is also worth using regular health checks to monitor blood pressure, blood lipids, and blood glucose, especially for long-term night workers. Many occupational-health programs include such screening; if not, primary-care providers can arrange it. When early signs of metabolic disturbance appear, adjustments in diet, activity, and sometimes medication can reduce progression.

For broader context on health risks and prevention, readers may find our Health and World sections useful, where we often cover public-health trends and workplace-health initiatives.

Mental Health, Food, and Coping With Fatigue

Night-shift work does not only affect the body; it also affects mood, social life, and mental health. Feelings of isolation, irritability, and low mood are common, and food can become both comfort and coping mechanism. While there is nothing inherently wrong with enjoying comforting foods, relying heavily on them to manage stress or fatigue can create unhelpful patterns.

Some people find it useful to distinguish between "fuel eating" (to support energy and health) and "comfort eating" (to manage emotions). Both have a place, but bringing awareness to the difference can reduce guilt and help maintain balance. For example, planning a favourite snack for a particular break can make it feel intentional rather than like a loss of control.

Hydration and micronutrient-rich foods can also influence how people feel. Mild dehydration can worsen fatigue and concentration, while diets low in certain nutrients-such as iron, B vitamins, and omega-3 fats-may contribute to low mood in some individuals, according to research summarized by institutions like Harvard Health Publishing. Including iron-rich foods (meat, legumes, fortified grains), leafy greens, and sources of omega-3s (oily fish, flaxseeds, walnuts) is a pragmatic step.

It is important to note that persistent low mood, anxiety, or signs of burnout are not simply nutrition problems. They warrant proper assessment and support. Occupational health services, primary-care physicians, and mental-health professionals can all play a role. Nutrition can support resilience, but it does not replace sleep, fair workloads, or psychological care.

Making It Work in the Real World

Healthy eating on night shifts is not about perfection. It is about stacking small, repeatable choices in your favour, within the constraints of your job, family life, and energy. A few practical starting points many workers find achievable:

Decide on one pre-shift meal template and repeat it most nights, varying ingredients but keeping the structure.

Pack at least one protein-rich snack for every shift to avoid relying only on vending machines.

Set a personal caffeine cut-off time and experiment with it for a few weeks to see how sleep responds.

Batch-cook one freezer-friendly dish on days off and portion it into individual containers.

Keep a refillable water bottle at work and aim to finish it at least once or twice per shift.

Over time, these habits can become automatic, freeing up mental space for the demands of the job itself. For ongoing ideas, recipe inspiration, and coverage of how technology, workplace culture, and public policy intersect with health, our Lifestyle, Technology, and Business sections regularly explore innovations that may eventually make night work healthier and more sustainable. Night shifts are unlikely to disappear from modern life, but the belief that working them must inevitably damage health is outdated. With realistic planning, supportive workplaces, and evidence-informed nutrition strategies, many people can work nights while still protecting their long-term wellbeing.

Beginner Pilates Exercises for Better Posture and Control

Last updated by Editorial team at fitbuzzfeed.com on Thursday 22 October 2026
Article Image for Beginner Pilates Exercises for Better Posture and Control

Beginner Pilates Exercises for Better Posture and Control

Pilates has a reputation for long, lean muscles and impressive core strength, but one of its most practical benefits is how quickly it can improve posture and body control in everyday life. For people who sit at desks, scroll on phones, or feel generally "out of alignment," a few foundational Pilates moves practiced consistently can make standing tall and moving smoothly feel almost effortless.

This guide focuses on beginner-friendly mat exercises that target postural muscles, teach control, and can be done at home with minimal space and no equipment. It also explains how to integrate them safely into a broader fitness and wellness routine.

Why Pilates Helps Posture So Effectively

Pilates was originally developed by Joseph Pilates in the early 20th century as a method to build strength, flexibility, and balanced muscle development with a strong focus on the spine and deep core. Unlike many traditional gym exercises that emphasize large, superficial muscles, Pilates prioritizes the smaller stabilizer muscles around the spine, hips, and shoulders, which are crucial for posture and controlled movement.

Many of the core principles of Pilates-such as concentration, control, centering, precision, breath, and flow-directly support better alignment. When someone practices regularly, they learn to recruit deep abdominal muscles (including the transverse abdominis), pelvic floor, and spinal stabilizers instead of overusing the lower back or neck. Organizations such as Pilates Method Alliance and major health systems, including the Cleveland Clinic and Mayo Clinic, note that Pilates can improve posture, reduce back pain, and enhance body awareness when done with proper technique.

Improved posture also supports better breathing mechanics and can reduce strain on joints, which is important for anyone combining Pilates with more intense training such as running, strength work, or sports. For those returning to movement after a sedentary period, Pilates can serve as a low-impact gateway back into broader fitness and physical activity.

Getting Started: Safety, Setup, and Mindset

Before diving into specific exercises, a few basics help make Pilates safer and more effective, especially for beginners.

First, check in with a healthcare professional if you have existing back pain, osteoporosis, recent surgery, or joint issues. Organizations such as the American Physical Therapy Association and NHS (UK) highlight that while Pilates can be beneficial for many musculoskeletal conditions, modifications may be required. If you are pregnant or recently postpartum, seek guidance from a qualified instructor with pre/postnatal training.

For equipment, a simple exercise or Pilates mat is enough. A firmer mat is often better than very soft foam because it provides support for spinal alignment. Comfortable clothing that allows full range of motion is ideal. Bare feet generally work best, as they help with grounding and control.

Mindset matters in Pilates: it is not about rushing or "smashing" a workout. Instead, think of each session as practice in precision and awareness. Move slowly, focus on the quality of each repetition, and stop if you feel sharp pain, tingling, or dizziness. Mild muscular fatigue or a sense of deep engagement around the midsection is normal; pain is not. Beginners often benefit from pairing Pilates with other wellness practices such as mindful breathing or stretching to support recovery.

Breathing and Neutral Spine: The Foundation of Control

Many Pilates teachers start with breath and spinal alignment because these two elements shape every other exercise. Learning them first will help you get more out of the movements that follow.

Begin by lying on your back with knees bent, feet hip-width apart, and arms resting by your sides. Allow your spine to settle into its natural curves: a slight curve in the lower back, ribcage resting on the mat, and a gentle curve at the neck. This is often called "neutral spine." You should be able to slide a thin sheet of paper under the small of your back, but not your entire hand.

Pilates typically uses "lateral" or "posterolateral" breathing: instead of breathing mainly into the belly, you direct the inhale into the sides and back of the ribcage. Place your hands on the lower ribs. Inhale through the nose and feel the ribs expand sideways and into the mat. Exhale through the mouth as if fogging a mirror, feeling the ribs knit together and the front of the body gently draw inward. This exhale is when you subtly engage the deep abdominals, imagining a corset wrapping around the waist. The American Council on Exercise emphasizes this breathing style as a key element of Pilates' core activation.

Spending two to three minutes practicing this breathing in neutral spine can significantly improve control in the following exercises. It also helps counter shallow chest breathing that is common with stress and poor posture, supporting better oxygenation and relaxation.

Pelvic Curl: Mobilizing the Spine and Waking Up the Core

The pelvic curl, sometimes called a basic bridge in Pilates, is an excellent starting exercise for spinal mobility, glute activation, and core control-all essential for upright posture.

From the same neutral spine position on your back, inhale to prepare. As you exhale, gently engage your abdominals and tilt your pelvis so your lower back imprints softly into the mat. Continue rolling the spine up, one vertebra at a time, until your hips lift into a diagonal line from shoulders to knees. Avoid arching the lower back or flaring the ribs; the work should be in the glutes and hamstrings, supported by the core. Inhale at the top, then exhale to roll down slowly, articulating through the spine until you return to neutral.

Perform 8-10 slow repetitions. This movement teaches segmental control-rolling the spine rather than hinging at one point-which can help reduce stiff, block-like movement in the back. It also strengthens the posterior chain, a group of muscles often underused when people spend long hours sitting. For readers who combine Pilates with other sports or gym work, a well-performed pelvic curl supports hip extension and reduces reliance on the lower back during lifting and running.

If you experience discomfort in the knees, bring your feet slightly closer to or farther from your hips to find a more comfortable angle. For lower back sensitivity, reduce the height of the lift and focus on gentle articulation rather than range.

Chest Lift: Core Strength Without Neck Strain

Classic sit-ups often encourage pulling on the neck and overworking the hip flexors, which can worsen posture. The Pilates chest lift is designed to strengthen the abdominals while maintaining length through the spine and neck.

Lying on your back in neutral spine, interlace your fingers and place them behind your head, elbows in your peripheral vision rather than flaring wide. Inhale to prepare. As you exhale, engage the deep abdominals and gently nod the chin as if you are holding a soft peach under it. Then curl the head, neck, and upper shoulders off the mat, sliding the ribcage toward the pelvis. Your lower back stays in neutral or gently imprinted, not yanked flat. Inhale to hold, then exhale to lower back down with control.

Aim for 8-12 repetitions, prioritizing quality over quantity. The American College of Sports Medicine and other exercise science organizations highlight that controlled trunk flexion with proper support can enhance core endurance, which is closely linked to spinal health and posture. You should feel the work mainly in the front of the torso, not as tension in the neck or shoulders. If the neck is uncomfortable, reduce your range of motion or support your head a bit more with your hands while maintaining the feeling that the abdominals are initiating the lift.

Over time, the chest lift helps counter the rounded upper back and forward head posture that comes from device use and desk work. It also prepares you for more advanced Pilates variations like the hundred or criss-cross, which demand stronger abdominal endurance and coordination.

Spine Twist Supine: Training Rotation and Stability

Healthy posture is not only about standing straight; it also involves the ability to rotate and return to center without strain. The spine twist supine exercise trains controlled rotation of the lower body while the upper body remains stable, reinforcing the connection between the ribcage, pelvis, and deep core.

Start on your back again, but this time bring your legs into a tabletop position: hips and knees bent at roughly 90 degrees, knees together, shins parallel to the floor. Extend your arms out to the sides in a T position, palms facing up. Inhale to prepare. As you exhale, engage your abdominals and slowly rotate your legs to one side, keeping the knees together and shoulders heavy on the mat. Go only as far as you can without one shoulder lifting. Inhale to hold at your end range, then exhale to draw the legs back to center using the obliques. Repeat to the other side.

Perform 6-8 slow rotations each way. This exercise strengthens the obliques and deep stabilizers that help maintain a neutral spine during twisting movements in daily life, such as turning to reach something or rotating in sports. It also provides a gentle stretch for the lower back and hips. For those exploring broader health benefits, trunk rotation work like this can improve spinal mobility that often declines with age and sedentary habits.

To modify, keep the feet on the floor with knees bent instead of in tabletop. This reduces the load on the spine while preserving the rotational pattern. Focus on keeping the movement smooth and controlled rather than swinging the legs.

Cat-Cow and Child's Pose: Resetting the Spine Between Sets

While cat-cow and child's pose come from yoga rather than classical Pilates, many contemporary Pilates instructors integrate them because they complement core work and support spinal health. They are particularly useful as "reset" movements between more demanding exercises.

For cat-cow, come onto hands and knees with wrists under shoulders and knees under hips. Inhale as you gently arch the back, allowing the chest to open and the tailbone reach upward (cow). Exhale as you round the spine, drawing the abdominals in and tucking the tailbone (cat). Move slowly through 8-10 cycles, coordinating breath and movement. This mobilizes the entire spine and highlights where stiffness may be contributing to poor posture.

From there, shift back into child's pose by sitting your hips toward your heels and extending your arms forward, forehead resting on the mat if comfortable. Breathe into the back of the ribcage for 4-8 slow breaths. This position gently lengthens the spine and can relieve tension in the lower back and shoulders. Health organizations such as Kaiser Permanente and Johns Hopkins Medicine often include similar spinal mobility and stretching drills in their back-care recommendations.

Integrating these moves into a Pilates session supports recovery and reinforces the idea that posture is dynamic. You are not trying to lock the spine into a rigid "perfect" position, but rather to maintain easeful alignment through a full range of motion.

Swan Prep: Opening the Chest and Strengthening the Back

Many people focus on abdominal work for posture and forget that the upper back extensors are equally important for standing tall. The swan prep exercise strengthens these muscles while opening the front of the body, countering the hunched position of desk work.

Lie on your stomach with legs extended hip-width apart, forehead resting on the mat, and hands under the shoulders or slightly wider. Draw the shoulder blades gently down the back, away from the ears. Inhale to prepare. As you exhale, engage the abdominals lightly to support the lower back, then press gently into the hands to lift the head, chest, and upper ribs off the mat. Keep the back of the neck long, eyes looking slightly forward and down. Your lower ribs may remain in contact with the mat; this is a small, controlled lift rather than a deep backbend. Inhale at the top, then exhale to lower with control.

Start with 6-8 repetitions. The goal is to feel the work between the shoulder blades and along the spine, not as compression in the lower back. If you feel pinching in the lumbar area, reduce the height of your lift or bring your hands slightly farther forward. The National Institutes of Health and various rehabilitation guidelines highlight that balanced strengthening of both flexors (front) and extensors (back) is key to reducing back discomfort and maintaining functional posture.

Over time, swan prep can progress into more advanced swan variations, but even the basic version is powerful for posture. It helps retrain the body to open the chest, draw the shoulders back and down, and support the head in a more neutral position instead of jutting forward.

Shoulder Bridge Prep: Hip Stability and Pelvic Control

While the pelvic curl focuses on spinal articulation, the shoulder bridge prep adds an element of single-leg control that challenges hip stability and pelvic alignment-two factors that strongly influence standing and walking posture.

Begin in the bridge position: lying on your back, knees bent, feet hip-width apart, and hips lifted into a line from shoulders to knees. Arms rest by your sides. From here, shift your weight slightly into one foot without letting the pelvis drop or twist. Gently float the opposite heel off the mat, keeping the knee bent, then place it back down. Alternate sides, performing 6-8 lifts each leg. Throughout, imagine your pelvis as a tray of water you are trying not to spill.

This exercise trains the glutes and deep hip stabilizers to keep the pelvis level, which is vital for people who walk or run a lot or who experience one-sided back or hip tightness. It also builds awareness of asymmetries-many people notice that one side feels less stable-which can guide future training choices or prompt consultation with a physiotherapist if needed.

If the bridge position feels too intense, practice the same weight shift and heel lift with your hips on the mat first. Focus on minimizing movement through the pelvis and spine as the legs alternate.

Seated Spine Stretch: Lengthening the Back of the Body

Good posture requires not just strength, but also adequate flexibility in the hamstrings, calves, and back muscles. The seated spine stretch is a classical Pilates move that encourages length along the back of the body while teaching segmental spinal flexion.

Sit on the mat with your legs extended in front of you, hip-width apart, and feet flexed. If your hamstrings are tight and your lower back rounds, sit on a folded blanket or cushion to elevate the hips. Extend your arms forward at shoulder height, parallel to the floor. Inhale to sit tall, imagining a string lifting the crown of your head. As you exhale, nod the chin slightly and articulate the spine forward, reaching the arms toward the toes while keeping the shoulders relaxed and the abdominals engaged. Think of "peeling" the spine off an imaginary wall behind you. Inhale to hold the stretch, then exhale to stack the spine back up from the base to the top.

Repeat 6-8 times. This movement helps lengthen the thoracolumbar fascia and hamstrings while reinforcing the feeling of growing tall from the sit bones upward. It contrasts with slumping forward from the chest or collapsing through the lower back, patterns that contribute to postural fatigue. For those interested in broader lifestyle improvements-such as sitting more comfortably at work or feeling looser during daily activities-this kind of active stretching can be more effective than passive, static holds alone.

If you experience numbness or tingling in the legs, adjust your position, bend the knees slightly, or reduce the depth of the forward reach. As always, prioritize a pain-free range of motion.

Putting It Together: A 15-20 Minute Beginner Routine

For readers looking for a simple starting point, the exercises above can be combined into a short routine performed three times per week. After a brief warm-up and breathing practice, the sequence might look like this:

Breathing in neutral spine (2-3 minutes)

Pelvic curl (8-10 reps)

Chest lift (8-12 reps)

Spine twist supine (6-8 each side)

Cat-cow (8-10 cycles)

Swan prep (6-8 reps)

Shoulder bridge prep (6-8 each leg)

Seated spine stretch (6-8 reps)

Finish with child's pose and a few deep breaths

This routine emphasizes mobility, core strength, and upper-back activation in a balanced way. It can be integrated into a broader fitness or nutrition-supported wellness plan, and scaled up over time by adding repetitions, slower tempos, or additional beginner-level Pilates moves such as leg slides, side-lying leg lifts, or the hundred (with modifications).

Organizations like Harvard Health Publishing and the World Health Organization emphasize that regular physical activity, including muscle-strengthening and flexibility work, is linked to better long-term health outcomes. Pilates fits naturally into these guidelines, particularly for people seeking low-impact options that support posture, balance, and control.

Progression, Consistency, and When to Seek Guidance

The benefits of Pilates for posture and control come from consistent practice rather than occasional long sessions. Many beginners notice changes in body awareness after just a few weeks, such as catching themselves slouching and naturally adjusting. Improvements in strength and endurance typically build over several months, especially if Pilates is combined with walking, resistance training, and supportive lifestyle choices such as adequate sleep and balanced nutrition.

As you progress, consider exploring more structured programs led by certified instructors. Professional organizations like the National Pilates Certification Program maintain standards for instructor education. Group classes, whether in-person or virtual, can provide real-time feedback on alignment and technique, reducing the risk of reinforcing poor habits. This can be particularly helpful if you have a history of back pain, are older, or are returning to exercise after injury.

If you experience persistent pain, numbness, or significant discomfort during or after Pilates sessions, it is important to consult a qualified healthcare provider such as a physiotherapist or sports medicine physician. In some cases, targeted rehabilitation or diagnostic assessment is necessary before progressing with more demanding core work. For readers following broader news on health and movement trends, it is worth remembering that no single method-Pilates included-is a cure-all; it is most effective as part of a comprehensive approach to movement and wellbeing.

Ultimately, beginner Pilates exercises offer a practical toolkit for standing taller, moving with more control, and feeling more at home in your body. With a mat, a small amount of space, and a commitment to slow, intentional practice, posture becomes less about "holding yourself rigidly straight" and more about cultivating strength, mobility, and ease that carry into every part of daily life.

Beginner Calisthenics Skills You Can Practice at Home

Last updated by Editorial team at fitbuzzfeed.com on Wednesday 21 October 2026
Article Image for Beginner Calisthenics Skills You Can Practice at Home

Beginner Calisthenics Skills You Can Practice at Home

Calisthenics strips training back to the basics: your body, gravity, and a bit of creativity. For beginners, that simplicity is exactly what makes it so effective-and easy to start at home, even with limited space and no equipment. The challenge is usually not "what to buy," but "what should I actually practice, and in what order, so I don't get hurt or overwhelmed?"

This guide focuses on foundational calisthenics skills you can safely build in a living room, bedroom, or small home gym. It emphasizes technique, progressions, and realistic expectations rather than flashy moves that demand a pull-up bar park or years of training.

Why Calisthenics Is So Beginner-Friendly

At its core, calisthenics is about mastering movement patterns-pushing, pulling, squatting, hinging, and bracing-using your body weight as resistance. That makes it a natural entry point for people who want to get stronger, move better, and build muscle without committing to a full gym setup.

Organizations like the American College of Sports Medicine highlight bodyweight exercise as a safe and effective way to improve strength and endurance when properly progressed and performed with sound technique (https://www.acsm.org/). Because you control the range of motion and leverage, you can usually adjust difficulty simply by changing your body angle or support points. This is ideal for home training, where you might be working around limited equipment, old injuries, or long breaks from exercise.

For sports fans interested in broader training ideas beyond calisthenics, our fitness, training, and physical sections explore different ways to structure workouts, mix cardio and strength, and stay consistent over time.

Setting Up a Safe Home Space

Before diving into specific skills, it is worth taking a moment to set up a safe, practical training area. You do not need much: a couple of square meters of floor, a sturdy chair or sofa edge, and ideally a free wall. A yoga mat or folded rug can help protect your wrists and knees during floor work, but a firm, non-slippery surface is more important than softness.

Health authorities such as the World Health Organization recommend adults aim for at least 150-300 minutes of moderate-intensity activity per week, including muscle-strengthening activities on two or more days (https://www.who.int/). Home calisthenics can cover that strength component if you treat it with the same seriousness you would a gym routine: warm up, focus on technique, and progress gradually. A brief dynamic warm-up-arm circles, leg swings, hip circles, and a few easy squats and wall push-ups-prepares joints and raises body temperature with minimal time investment.

If you are new to exercise, managing a chronic condition, or returning after a long break, organizations such as the NHS in the UK and the Centers for Disease Control and Prevention in the US advise consulting a healthcare professional before starting a new program (https://www.nhs.uk/, https://www.cdc.gov/). This is especially relevant if you experience chest pain, dizziness, unexplained shortness of breath, or joint issues during daily activities.

Foundational Skill 1: Plank Variations for Core Control

For calisthenics, core strength is not just about visible abs-it is about the ability to stabilize your spine while arms and legs move. The plank is a fundamental skill that teaches this "bracing" pattern and carries over to push-ups, handstands, and more advanced skills.

A basic forearm plank starts face-down on the floor, elbows under shoulders, forearms parallel, and legs extended. The key is to maintain a straight line from head to heels while lightly tucking the pelvis, engaging the glutes, and drawing the ribcage down so the lower back does not sag. Many beginners unconsciously hold their breath; instead, aim for steady, controlled breathing through the nose or light mouth exhale. When done correctly, you should feel tension across the midsection, not sharp pain in the lower back.

If a full plank feels too challenging, elevate your hands or forearms on a sofa, bench, or sturdy table. Elevation reduces the load and allows you to practice proper alignment before progressing. On the other hand, if a basic plank becomes easy beyond 45-60 seconds, you can experiment with shoulder taps (from a high plank), slow mountain climbers, or "stir the pot"-style movements on a cushion or instability surface, always prioritizing control over speed. Our wellness section often returns to this idea of quality over quantity-especially relevant when training alone at home without a coach's eye.

For deeper background on core training and spine safety, resources from organizations like the National Strength and Conditioning Association and university exercise science departments such as Harvard Health Publishing offer accessible overviews of evidence-based approaches (https://www.nsca.com/, https://www.health.harvard.edu/).

Foundational Skill 2: Push-Up Progressions for Upper-Body Strength

Push-ups are the cornerstone pushing movement in calisthenics, targeting the chest, shoulders, triceps, and core. They also teach body tension and shoulder stability in a way that translates to more advanced skills like dips and handstand work. However, full floor push-ups are often too difficult for beginners, leading to poor form and frustration.

A more accessible starting point is the wall push-up. Stand about an arm's length from a wall, place your hands slightly wider than shoulder-width, and lower your chest toward the wall while keeping your body in a straight line. Once you can do 15-20 controlled repetitions with a full range of motion and no discomfort, progress to an incline push-up with your hands on a sturdy surface like a countertop, table, or bench. Reducing the incline over time gradually increases the load until you are ready for floor push-ups.

On the floor, focus on hand placement under or slightly outside the shoulders, fingers spread for stability, and elbows tracking at roughly 30-45 degrees from the torso rather than flared straight out. Lower under control until your chest is just above the ground, then press back up while maintaining a rigid plank position. If full push-ups remain out of reach, you can also use "eccentric" reps-lowering slowly from the top, then dropping knees to return to the start-to build strength through the hardest portion of the movement.

Coaching guides from organizations like ACE (American Council on Exercise) and ExRx.net provide detailed cues and common error corrections for push-ups and their variations (https://www.acefitness.org/, https://exrx.net/). For broader upper-body training ideas that complement push-ups, you can explore our training and fitness coverage.

Foundational Skill 3: Squats and Lunges for Lower-Body Strength

Calisthenics is sometimes associated mainly with upper-body feats, but strong legs and hips are non-negotiable for athletic movement, injury prevention, and everyday function. Bodyweight squats and lunges are the primary skills to master at home, and they also build the foundation for more advanced moves like pistol squats or jump variations.

A basic bodyweight squat begins with feet roughly shoulder-width apart and toes slightly turned out. Initiate the movement by bending at hips and knees simultaneously, as if sitting back into a chair, while keeping the chest lifted and knees tracking in line with the toes. Depth will vary by individual hip and ankle mobility; aim for control and joint alignment rather than forcing a deep squat. If balance is an issue, holding onto a doorframe or countertop for light support can help you learn the pattern.

Lunges introduce unilateral (single-leg) strength and stability. From a standing position, step one foot forward, lower the back knee toward the floor under control, then push through the front heel to return to standing. You can adjust the length of your step to find a comfortable hip and knee angle. Beginners often benefit from "split squats," where the feet remain in a staggered stance and you move up and down without stepping each rep, which reduces coordination demands.

Guidelines from groups like The American Council on Exercise, Mayo Clinic, and national health services emphasize that knee pain during squats and lunges is usually a sign to adjust form, range of motion, or volume rather than to abandon the movements altogether (https://www.mayoclinic.org/). If discomfort persists, professional assessment is advisable. For readers interested in how lower-body strength work connects with running, cycling, or sports, our sports and physical sections provide additional context.

Foundational Skill 4: Glute Bridge and Hip Hinge Patterns

Many people spend large parts of the day sitting, which can leave the glutes underactive and the lower back overworked. The glute bridge and hip hinge patterns address this by teaching you to load and extend the hips rather than relying on the spine for movement, a crucial skill for both calisthenics and everyday tasks like lifting objects from the floor.

To perform a glute bridge, lie on your back with knees bent, feet flat and hip-width apart, and arms by your sides. Brace your core lightly, then drive through your heels to lift your hips until your body forms a straight line from shoulders to knees. Squeeze the glutes at the top without excessively arching the lower back, then lower slowly under control. If you feel this primarily in your hamstrings or lower back, experiment with bringing your feet slightly closer or further from your body and ensure you are actively contracting the glutes throughout.

Once a basic bridge is comfortable, you can progress to single-leg bridges, marching bridges (alternating leg lifts while holding the bridge), or hip thrusts with your shoulders elevated on a sofa or bench. These variations increase the challenge and prepare you for more dynamic hip-dominant movements such as hip hinges and eventually bodyweight good mornings or Nordic-style hamstring work.

Educational materials from institutions like Cleveland Clinic and Johns Hopkins Medicine often highlight glute and hip strengthening in their back-pain prevention advice (https://my.clevelandclinic.org/, https://www.hopkinsmedicine.org/). Integrating glute bridges into a home calisthenics routine can therefore support both performance and long-term joint health.

Foundational Skill 5: Hollow Body and Arch Holds for Full-Body Tension

As calisthenics skills progress, the ability to create and maintain full-body tension becomes increasingly important. Two simple but powerful positions-the hollow body hold and the arch (or "superman") hold-teach you to control the front and back of the body respectively, which carries over to pull-ups, levers, and handstands.

The hollow body hold starts lying on your back, arms extended overhead and legs straight. Gently press your lower back into the floor, engage your abs, and lift your head, shoulders, and legs a few centimeters off the ground, creating a subtle banana shape. The priority is maintaining contact between the lower back and floor; if it arches, reduce the lever by bending the knees, bringing arms to the sides, or lowering the legs. Short, high-quality holds of 10-20 seconds with full control are more valuable than long, shaky efforts.

The arch hold is the complementary pattern. Lying face-down with arms extended in front and legs straight, simultaneously lift the chest and thighs off the floor while squeezing the glutes and upper back. Avoid excessive neck extension by looking slightly ahead rather than up. This trains the posterior chain and helps balance the strong anterior focus of many bodyweight exercises.

Gymnastics-inspired training resources, including materials from USA Gymnastics and various national gymnastics federations, frequently emphasize these shapes as prerequisites for more complex skills (https://usagym.org/). For home practitioners, they are low-risk, equipment-free ways to develop awareness and strength across the whole body.

Foundational Skill 6: Assisted Rows and Doorframe Pulls (When Safe)

Pure pulling strength is harder to train at home without a bar or rings, but some beginner-friendly options exist. If you have a sturdy table that will not tip, you can perform inverted rows by lying underneath, gripping the edge, and pulling your chest toward it. Many people, however, do not have furniture designed for that kind of load, so safety must come first.

One accessible alternative is a towel or bedsheet row anchored securely around a solid post or banister, allowing you to lean back and pull your chest toward your hands. The more upright your body, the easier the movement; walking your feet further forward increases the challenge. It is critical that whatever you anchor to is structurally sound and not likely to move or break. Avoid using door handles or lightweight interior fixtures.

Some calisthenics communities suggest doorframe pull-ups using portable bars, but consumer safety agencies and groups like Consumer Reports have raised concerns about low-quality equipment or improper use leading to falls (https://www.consumerreports.org/). If you choose to invest in a pull-up bar, prioritize reputable brands, respect weight limits, and follow installation instructions closely. For readers exploring equipment choices or home-gym basics, our lifestyle and business coverage occasionally examines the broader fitness industry and product trends.

When in doubt, it is better to under-load pulling movements at home and supplement with resistance bands or occasional gym visits than to risk injury with improvised setups.

Foundational Skill 7: Balance and Coordination Drills

Calisthenics is not only about strength; balance and coordination are equally important, especially as skills become more dynamic. Simple single-leg balance drills, such as standing on one foot with the opposite knee raised, can be done almost anywhere and require no equipment. To increase difficulty, you can close your eyes, turn your head side to side, or perform gentle reaches with the free leg or arms.

Another valuable pattern is the "beast" or quadruped position: hands under shoulders, knees under hips, and knees hovering a few centimeters off the floor. Moving slowly forward, backward, and side to side from this position trains shoulder stability, core control, and coordination in a low-impact way. It also serves as a stepping stone toward more advanced locomotion patterns like bear crawls or crab walks.

Sports science literature, including work collected by organizations such as FIFA and World Rugby, often highlights balance and neuromuscular training as key factors in reducing lower-limb injury risk (https://www.fifa.com/, https://www.world.rugby/). Even if your goal is simply to move better in daily life rather than compete in sport, brief balance drills can support joint resilience and body awareness.

Structuring a Simple Beginner Home Calisthenics Session

Putting individual skills together into a coherent session helps ensure you are training the whole body and progressing over time. A straightforward structure for beginners might include a short warm-up, 4-6 core movements, and a brief cool-down. For example:

Warm-up: 5-8 minutes of dynamic movements (arm circles, leg swings, light squats, wall push-ups).

Main skills: a push variation (wall or incline push-ups), a squat or lunge, a core hold (plank or hollow body), a hip-dominant movement (glute bridge), a pulling option if safely available, and a balance or quadruped drill.

Cool-down: gentle stretches for hips, chest, shoulders, and back.

Working in circuits-performing one set of each exercise back-to-back, resting briefly, and repeating 2-4 times-keeps sessions time-efficient and slightly elevates heart rate for a conditioning effect. As you improve, you can increase total sets, extend hold times, or move to more challenging variations, but it is wise to change only one variable at a time. Our health and wellness sections frequently address recovery, sleep, and stress management, which all influence how quickly you can safely progress.

For additional planning guidance, public-health agencies like the US Department of Health and Human Services and Health Canada publish physical-activity recommendations that can help you frame how often and how hard to train each week (https://www.hhs.gov/, https://www.canada.ca/).

Recovery, Nutrition, and Habit-Building

Even at a beginner level, your body adapts between sessions, not during them. Adequate sleep, hydration, and nutrition support that adaptation. While calisthenics alone can improve strength and muscle tone, combining it with balanced eating patterns-emphasizing whole foods, sufficient protein, and appropriate energy intake-will make progress smoother. Evidence-based guidance from organizations like the Academy of Nutrition and Dietetics can be a useful starting point (https://www.eatright.org/). For more applied coverage, explore our nutrition and health pages.

Habit-building is equally important. Starting with three short sessions per week is usually more sustainable than aiming for daily, exhaustive workouts that quickly feel like a chore. Tracking a few simple metrics-total sets, hold times, or the incline height of your push-ups-helps make progress visible, which in turn reinforces motivation. If you have a wearable device or app, tools from companies like Garmin, Polar, or Apple can assist with logging activity and monitoring overall movement patterns (https://www.garmin.com/, https://www.polar.com/, https://www.apple.com/).

Finally, remember that calisthenics is a long game. The beginner skills outlined here might not look as impressive as advanced levers or handstand push-ups, but they are the groundwork that makes those moves possible and safe down the line. With consistent practice, gradual progression, and attention to recovery, a simple home routine can evolve into a powerful, sustainable way to stay strong and healthy for years.

Smart Ways to Add Fiber to an Athlete's Diet

Last updated by Editorial team at fitbuzzfeed.com on Tuesday 20 October 2026
Article Image for Smart Ways to Add Fiber to an Athlete's Diet

Smart Ways to Add Fiber to an Athlete's Diet (Without Hurting Performance)

Athletes often obsess over protein and carbs, but fiber quietly shapes everything from gut comfort on race day to long-term health. The challenge is that many performance diets-especially those heavy on refined carbs and quick-digesting snacks-fall short on fiber, while suddenly "loading up" can lead to bloating, gas, and bathroom emergencies at the worst possible time.

This guide looks at why fiber matters specifically for active people, how much is useful, and smart, practical ways to increase intake without sabotaging training or competition.

Why Fiber Matters for Athletes, Not Just for "Health Nuts"

Dietary fiber is best known for supporting digestion, but for athletes it also influences energy stability, recovery, and even immune function. Soluble fiber (found in foods like oats, beans, and many fruits) forms a gel in the gut, helping regulate blood sugar and cholesterol. Insoluble fiber (found in whole grains, bran, many vegetables) adds bulk and speeds transit through the intestines. Most plant foods contain a mix of both.

For performance, that mix can be powerful. A fiber-rich base diet supports a diverse gut microbiome, which in turn may influence inflammation, nutrient absorption, and immune resilience. Research summarized by organizations like the World Health Organization and Harvard T.H. Chan School of Public Health links higher fiber intake to lower risk of cardiovascular disease, type 2 diabetes, and certain cancers-long-term benefits that matter for athletes who want to stay healthy across an entire career or lifetime, not just a single season.

Fiber also helps with body composition. Because it adds bulk and slows digestion, it can support appetite control during cutting phases or weight-class management. At the same time, better bowel regularity and less GI distress between sessions can make training more comfortable, especially for endurance athletes who log high weekly mileage. The key nuance is timing and type: fiber is your friend most of the day, but too much too close to intense exercise can be a problem.

Fit people who want to go deeper into fundamentals of training and performance nutrition can explore our broader top coverage of fitness, training, and physical performance strategies.

How Much Fiber Do Active People Actually Need?

General guidelines from bodies such as the U.S. National Institutes of Health and Academy of Nutrition and Dietetics suggest around 25 grams of fiber per day for adult women and 38 grams for adult men, with a common rule of thumb of about 14 grams per 1,000 kcal consumed. Highly active athletes who eat 3,000-4,000 kcal per day could theoretically benefit from more, but "more" is not automatically better.

Three practical considerations matter for athletes:

Current intake: Many people are far below recommendations. Jumping from 10 grams to 40 grams per day in a week is a recipe for gas and cramping.

Training volume and style: Ultra-endurance athletes may tolerate or even thrive on higher fiber between key sessions, but they often reduce fiber before long races to reduce GI risk. Power or strength athletes with heavy lifting sessions may be less sensitive to moderate fiber near training, but still benefit from spacing it away from pre-workout meals.

Individual gut tolerance: Genetics, microbiome, and history of GI issues all play a role. Some athletes tolerate beans and cruciferous vegetables well; others find them problematic before workouts.

Sports nutrition guidance from groups like the American College of Sports Medicine and International Olympic Committee generally emphasizes tailoring fiber around training times rather than chasing a single "athlete number." A reasonable approach is to aim near general recommendations on most days, then adjust up or down based on personal tolerance, schedule, and competition demands.

For a broader look at how fiber fits into overall healthy eating, readers can also visit our always up-to-date nutrition and health sections.

Timing Fiber Around Training and Competition

Adding fiber is not just about what you eat, but when you eat it. Many endurance runners, cyclists, and field-sport athletes learn this the hard way.

A practical framework:

3-6 hours before intense training or competition: Emphasize easily digested carbohydrates with moderate, not high, fiber. Think white rice or pasta with some cooked vegetables, or oatmeal made with finely milled oats and peeled fruit. This window is where large, very high-fiber meals can come back to haunt you.

1-2 hours before exercise: Keep fiber low. Pre-workout snacks like bananas, white toast with a thin spread of nut butter, or low-fiber cereal with milk or a fortified plant drink are usually safer than raw salads or lentil bowls.

During exercise: Most sports drinks, gels, and chews are intentionally low in fiber to speed absorption and reduce GI risk. That is appropriate for most moderate to high-intensity sessions.

Immediately after training (0-2 hours): Prioritize protein and carbohydrate for recovery. Some fiber from whole foods is fine if tolerated, but this is still not the moment for your largest, densest fiber hit.

Between sessions and at main meals away from training: This is the ideal time to invest in high-fiber foods-whole grains, beans, lentils, fruits, vegetables, nuts, and seeds.

Athletes who struggle with GI issues may benefit from working with a sports dietitian-directories from organizations like the Sports, Cardiovascular and Wellness Nutrition practice group can help locate credentialed professionals.

Smart Breakfast Upgrades: High-Fiber Starts That Still Fuel Training

Breakfast is often the easiest place to add fiber, especially on non-race days or when training is scheduled later in the morning or midday. Small tweaks can significantly increase intake without a dramatic menu overhaul.

Swapping refined grains for whole grains is a straightforward starting point. Replacing white toast with whole-grain bread, or choosing a cereal with at least 4-5 grams of fiber per serving, can quickly add several grams. Oats are particularly useful because they provide soluble fiber (notably beta-glucan), which has been associated with improved cholesterol profiles and better glycemic control in research summarized by organizations such as Health Canada and NHS in the UK. A bowl of rolled or steel-cut oats topped with berries and a spoonful of ground flaxseed can easily deliver 8-12 grams of fiber.

For athletes who train early and need a lighter option, smoothies can be tailored to include fiber without feeling heavy. Using whole fruit instead of juice, adding a handful of oats or chia seeds, and including leafy greens like spinach can turn a simple shake into a more complete meal. Those who prefer savory breakfasts can boost fiber by adding vegetables and beans to egg dishes-think a vegetable and black bean omelet or scrambled eggs with sautéed spinach and mushrooms, paired with whole-grain toast.

Readers interested in broader lifestyle strategies that support morning energy and routine can explore our well researched lifestyle and wellness articles.

Building High-Fiber Lunches and Dinners That Don't Feel Like "Diet Food"

Main meals are where the biggest fiber gains usually happen, especially for athletes who currently rely on large portions of white rice, pasta, or bread. The goal is not to eliminate refined grains entirely-many athletes use them strategically before and after training-but to ensure that across the day, higher-fiber options appear frequently.

One effective strategy is to anchor meals around a whole grain plus a plant protein. Swapping white rice for brown rice, quinoa, bulgur, farro, or whole-wheat couscous can double or triple the fiber content of a dish. Adding beans, lentils, or chickpeas further boosts fiber and protein. For example, a quinoa and black bean bowl with roasted vegetables and avocado offers a balanced mix of carbohydrates, fiber, healthy fats, and plant protein. Athletes who eat meat or fish can still use this pattern by keeping the grain and legume base and simply reducing the legume portion slightly to make room for animal protein.

Vegetable variety matters as well. Non-starchy vegetables such as broccoli, Brussels sprouts, carrots, green beans, and leafy greens contribute both fiber and micronutrients. Roasting vegetables in olive oil, adding them to pasta sauces, or mixing them into grain salads can make them more appealing and calorie-dense, which is useful for high-volume training phases. For athletes worried about fullness, lightly cooking vegetables (rather than eating them raw) can improve tolerance and reduce bloating.

Balancing high-fiber meals with training is crucial. On heavy training days, some athletes may choose lower-fiber starches such as white rice or potatoes in the pre- and post-workout windows while keeping higher-fiber dishes for meals further from sessions. On lighter days or rest days, they might shift toward more whole grains and legumes to support overall health and satiety.

High-Fiber Snacks That Work With, Not Against, Training

Snacks are often where athletes default to ultra-processed, low-fiber options: pastries, candy, low-fiber bars, or sugary drinks. Thoughtful snack choices can easily add 5-10 grams of fiber per day without a major effort.

Fruit is the obvious starting point. Whole fruits like apples, pears, berries, oranges, and kiwifruit provide fiber, vitamins, and hydration. Pairing fruit with protein or healthy fats-for example, an apple with peanut butter, berries with Greek yogurt, or a banana with a handful of nuts-can create a more balanced snack that sustains energy between meals. Dried fruits such as figs, prunes, and dates are concentrated sources of fiber and carbohydrates, but their density means portion control is important for those managing weight.

Nuts and seeds are compact, portable, and energy-dense, making them particularly useful between training sessions or during long days at events. Almonds, pistachios, walnuts, sunflower seeds, chia seeds, and flaxseeds all contribute fiber along with healthy fats and micronutrients. Sprinkling seeds onto yogurt, oatmeal, or salads is a simple way to increase fiber without dramatically changing the meal.

For athletes who like packaged options, choosing snack bars with at least 3-5 grams of fiber and limited added sugars can be a step up. Some bars use added fibers like inulin or chicory root; while these can increase total fiber, they may cause GI discomfort in larger amounts, especially for athletes prone to gut issues. Paying attention to personal tolerance and testing new products on low-stakes training days is essential.

Using Beans, Lentils, and Whole Grains Without the Bloat

Legumes and whole grains are among the most fiber-dense foods, but they're also the ones most often blamed for gas and discomfort. Rather than avoiding them altogether, athletes can use preparation techniques and gradual exposure to improve tolerance.

Soaking and thoroughly cooking beans and lentils can reduce compounds that contribute to gas. Canned beans, when rinsed well, are often easier to digest than undercooked dried beans. Starting with smaller portions-such as a few spoonfuls mixed into salads, soups, or grain bowls-allows the gut microbiota to adapt over time. Similarly, switching from white to whole-grain products gradually (for example, mixing white and brown rice or alternating types of pasta) can help the digestive system adjust.

Variety also matters. Some individuals tolerate lentils better than chickpeas, or vice versa. Trying different legumes-black beans, kidney beans, cannellini beans, split peas, red lentils-can reveal personal favorites that provide fiber with minimal downside. For athletes who struggle with very high-fiber dishes, using legumes more as a garnish or side rather than the main bulk of the meal can still meaningfully increase intake.

Whole grains can be introduced in simple ways: choosing whole-grain bread, adding barley or farro to soups, or making overnight oats. Organizations like Oldways and the Whole Grains Council provide practical ideas and grain guides that can help athletes and coaches diversify menus.

Hydration, Electrolytes, and Fiber: The Overlooked Trio

Fiber's benefits depend partly on fluid intake. Insoluble fiber draws water into the stool, and soluble fiber forms gels that also rely on adequate hydration. Without enough fluid, higher fiber can lead to constipation or discomfort rather than regularity.

Athletes already have elevated fluid needs because of sweat losses. When increasing fiber, it becomes even more important to match intake with adequate water and, for heavy sweaters or those training in hot conditions, electrolytes. Guidance from organizations like World Athletics and sports nutrition texts suggests personalizing hydration plans based on sweat rate, climate, and session length, but a simple starting point is to monitor urine color (aiming for pale yellow) and adjust from there.

Salt, potassium, and other electrolytes also play a role in gut comfort. Extreme low-sodium diets are uncommon in high-level sport, but athletes who heavily restrict salt while simultaneously adding a lot of fiber may experience cramping or feelings of heaviness. Including some salty foods around training, using electrolyte drinks when appropriate, and not neglecting mineral-rich plant foods (such as leafy greens, beans, and nuts) can help maintain balance.

Fans interested in broader health and performance implications of hydration and environment can also explore our often quoted sports, world, and news sections for context on heat, climate, and event conditions.

Fiber Supplements and "Functional" Fibers: When Are They Useful?

While whole foods should form the backbone of any performance diet, some athletes consider fiber supplements-powders, capsules, or high-fiber drink mixes-especially when traveling, in heavy competition phases, or when appetite is low. Common supplemental fibers include psyllium husk, inulin, partially hydrolyzed guar gum, and resistant starch.

Psyllium, used in many over-the-counter products, has good evidence for supporting bowel regularity and cholesterol management, as highlighted by institutions like the Mayo Clinic and Cleveland Clinic. However, it must be taken with plenty of water, and doses should be increased gradually. Inulin and some other fermentable fibers can be helpful for gut bacteria but may cause gas or discomfort in sensitive individuals, particularly those with irritable bowel syndrome or other GI conditions.

For athletes, supplements can be a backup, not a primary strategy. They may be useful when travel or logistics make whole-food options difficult, or when a sports dietitian uses them deliberately to address constipation. But they do not replace the diverse micronutrients, phytochemicals, and overall dietary patterns that come with fiber-rich whole foods. As always, new supplements should be trialed well before important competitions, not the week of a major race or event.

Gradual Change and Personal Experimentation

Adding fiber to an athlete's diet is less about hitting a single perfect number and more about building a sustainable pattern that supports both performance and long-term health. For most active people, this means:

Gradually increasing fiber intake over several weeks rather than making abrupt jumps.

Prioritizing whole grains, fruits, vegetables, legumes, nuts, and seeds across the day, especially in meals and snacks away from intense training.

Keeping pre- and mid-workout foods relatively low in fiber to reduce GI risk.

Matching increased fiber with adequate hydration and appropriate electrolyte intake.

Paying attention to individual gut responses and adjusting specific foods, portions, and timing accordingly.

For athletes who want to refine their approach further-whether to manage weight, improve GI comfort in competition, or support long-term health-consulting a registered dietitian with sports nutrition expertise can be invaluable. Combined with thoughtful training planning and recovery habits, smart fiber strategies can help keep the body running smoothly, on and off the field.

Cycling Safety Tips for Busy City Streets

Last updated by Editorial team at fitbuzzfeed.com on Monday 19 October 2026
Article Image for Cycling Safety Tips for Busy City Streets

Cycling Safety Tips for Busy City Streets

Riding a bike through crowded city streets can be fast, fun, and efficient-but it also demands sharper awareness and better planning than a quiet weekend ride. Congested traffic, distracted drivers, complex intersections, and mixed infrastructure mean urban cyclists need a clear strategy for staying safe, visible, and confident.

This guide brings together practical, research-backed tips from road safety organizations, cycling advocates, and urban planners to help riders navigate busy streets more safely, whether they are commuting daily or just starting to swap short car trips for two wheels.

Know the rules of the road like a driver

In most countries, cyclists are legally considered vehicles and are expected to follow the same traffic rules as drivers. That means stopping at red lights and stop signs, yielding when required, and riding in the correct direction of traffic. Many collisions happen not because a cyclist is "invisible," but because someone does something unexpected-like riding against traffic or blowing through a red light. Understanding and obeying road rules helps drivers predict your movements and gives you legal protection if a crash occurs. National and local transport agencies, such as the U.S. National Highway Traffic Safety Administration (NHTSA) and the UK's Department for Transport (GOV.UK), provide clear guidance on how bikes fit into traffic law, and local city websites often publish cycling-specific rules, including where bikes can ride, turn, and park.

It is worth checking whether your city allows riding on sidewalks, which is often restricted or banned in dense downtown areas because it creates conflicts with pedestrians. Similarly, some cities mandate the use of bike lanes where available, while others simply recommend them. Understanding right-of-way rules at intersections and roundabouts is particularly important; many serious urban cycling crashes occur at junctions where drivers turning right or left fail to see a cyclist going straight. Reviewing your area's highway code or equivalent, and even taking a short urban cycling skills course if available, can significantly improve your decision-making in traffic.

For riders who use cycling as part of their training or fitness routine, treating city segments as "neutral zones" rather than race sections is essential. Save high-intensity efforts for safer routes or structured sessions off busy arterials; in traffic, the priority is predictable, law-abiding behavior, not speed. If you track your rides for performance or upload to fitness platforms, consider pausing segments or ignoring city-center times so you are not tempted to take risks for a faster commute.

Choose safer routes, not just the shortest ones

The most direct line from home to work is not always the safest or most comfortable by bike. Whenever possible, choose routes that minimize high-speed multi-lane roads, complex intersections, and heavy truck traffic. Many cities now publish official cycling maps through their transport departments, highlighting protected lanes, painted bike lanes, traffic-calmed streets, and recommended quiet routes; these are often accessible via city websites or local transit agencies. Internationally, organizations like PeopleForBikes (peopleforbikes.org) and Sustrans in the UK (sustrans.org.uk) also offer resources and route ideas that prioritize safety and comfort.

Digital maps and fitness apps increasingly include bike-specific routing, but they can still misjudge traffic stress, especially in fast-changing urban environments. Before committing to a new commute, preview the route on a map and, if possible, ride it once at a quieter time of day to identify problem spots such as fast slip lanes, tram tracks, or poorly designed junctions. Look for alternatives that use residential back streets, riverside paths, park cut-throughs, or dedicated cycleways, even if they add a few minutes. Over the long term, the reduced stress and lower risk are worth the minor detour, and the extra distance can even support your broader fitness goals.

Time of day matters too. If your schedule is flexible, shifting your commute 20-30 minutes earlier or later can dramatically change traffic density. In some cities, certain roads become bus lanes at peak times, which may or may not allow bicycles; check the signage and your local regulations so you are not caught off guard. Weather also affects route choice: in rain or snow, avoiding steep descents, metal bridge decks, and tram tracks can reduce the risk of slipping. Over time, many urban cyclists maintain multiple "go-to" routes-an all-weather option, a daylight-only scenic route, and a direct but traffic-heavy path used only when necessary.

Make visibility a priority, day and night

Being seen is one of the most powerful safety tools available to urban cyclists. Research cited by organizations like the World Health Organization (who.int) and national road safety bodies suggests that high-visibility clothing, reflective materials, and lights can significantly reduce crash risk, especially in low-light conditions. In many jurisdictions, front and rear lights are legally required after dark, and some cities now recommend or mandate daytime running lights for cyclists, particularly on busy roads. A bright white front light and a solid or slow-flashing red rear light are a strong baseline; higher-lumen lights or additional helmet-mounted lights can help in heavy traffic or poor weather.

Clothing choices also matter. While all-black outfits may look sleek, they blend into the urban environment at dawn, dusk, and in rain. High-visibility or at least contrasting colors on jackets, vests, or backpacks help drivers and pedestrians notice you sooner. Reflective elements placed on moving parts-ankle bands, shoe details, or pedal reflectors-can be especially effective because motion catches the eye. Many sportswear brands and technical apparel companies now integrate reflective panels into cycling and running gear, which can be a practical upgrade for people who regularly ride in low light and want to align their wardrobe with broader lifestyle and safety needs.

Positioning on the road also affects visibility. Riding too close to the curb can hide you behind parked cars, street furniture, or road undulations, making it harder for drivers to anticipate your line. In many situations, taking a more assertive position in the lane-far enough from the curb to avoid door zones and debris, but not unnecessarily obstructive-actually improves safety because it keeps you within the main field of view of drivers. Training yourself to think, "Can that driver see me clearly from their position?" and adjusting accordingly can be more effective than any single piece of gear.

Use bike lanes wisely-and know their limits

Dedicated cycling infrastructure can greatly improve safety, but it is not foolproof. Painted bike lanes often run in the "door zone" of parked cars, and even physically protected lanes can intersect with driveways, side streets, and bus stops. Studies highlighted by groups such as the European Cyclists' Federation (ecf.com) show that separated cycle tracks tend to reduce overall crash risk, yet many collisions still occur at intersections where turning vehicles cross bike paths. The key is to treat bike lanes as a helpful tool, not a guarantee of protection, and to adjust your speed and attention at conflict points.

When riding in a painted lane beside parked cars, maintain enough lateral distance to avoid being struck by an unexpectedly opened door. This may mean riding near the outer edge of the lane or even slightly outside it when safe and legal. In protected lanes that approach intersections, be alert for drivers turning across your path who may not expect a bike moving at speed; making eye contact where possible, moderating your speed, and watching for turn signals and wheel movement can buy you precious reaction time. Some cities now install bike-specific traffic lights or advance stop lines so cyclists can start ahead of motor traffic; understanding how these work in your area and using them correctly can reduce conflicts at junctions.

Shared paths with pedestrians, runners, and scooters introduce a different set of challenges. Speed differentials are often large, and some users may be wearing headphones or looking at phones. On these paths, slower speeds, clear passing signals (a bell or brief verbal cue), and extra patience are essential. In very crowded conditions-near stadiums, train stations, or major events-it may be safer and more respectful to dismount and walk for a short stretch. For riders focused on training or interval work, it is usually better to schedule hard efforts away from shared-use paths where frequent slowing and overtaking are required.

Master intersections, turning traffic, and door zones

Intersections are where many urban cycling crashes happen, particularly those involving turning vehicles and "dooring" incidents. Defensive techniques can dramatically reduce risk. When approaching an intersection, scan early for potential conflicts: cars waiting to turn across your path, pedestrians stepping off curbs, and buses pulling in or out. Position yourself where you are visible and not squeezed between large vehicles and the curb. Many road safety organizations, including Cycling UK (cyclinguk.org) and Vision Zero initiatives in major cities, recommend avoiding riding alongside heavy trucks at junctions because of large blind spots; if a truck is stopped at a light, it is often safer to wait behind it rather than trying to sneak up the side.

Dooring-being hit by a suddenly opened car door-is a common city hazard. To reduce the risk, ride at least a door's width away from parked cars whenever you can, even if that means taking what feels like a more central lane position. Watch for signs that a parked car might be about to open or pull out: brake lights, exhaust, wheels turned outward, or movement inside. Drivers and passengers do have legal responsibilities in many jurisdictions to check before opening doors, but relying solely on others' behavior is not enough; building a habit of maintaining door clearance is one of the simplest, most effective urban safety strategies.

Left and right turns require particular care. When turning left in countries where traffic drives on the right (or right in left-driving countries), signal early, shoulder-check, and move gradually into the correct lane, avoiding sudden swerves from the curb. In very heavy traffic or on multi-lane roads, it can be safer to use a "two-stage turn": cross straight through the intersection, stop in the far-side crosswalk or bike box, reorient your bike, and then cross again with the next green. Some cities explicitly mark these two-stage turn boxes for bikes. Practicing these maneuvers on quieter streets builds confidence before you need them at rush hour.

Ride predictably and communicate clearly

Predictability is one of the core principles of safe city cycling. Drivers, pedestrians, and other riders can adapt to your presence if your movements follow a clear, understandable pattern. Sudden swerves, last-second lane changes, or weaving between parked cars and traffic make it much harder for others to judge your path and speed. Instead, hold a steady line when possible, signal lane changes and turns with clear hand signals, and avoid squeezing through narrow gaps that may close unexpectedly. Many national cycling manuals and organizations like The League of American Bicyclists (bikeleague.org) emphasize that assertive, visible positioning usually leads to fewer close passes than timid hugging of the curb.

Hand signals are a simple but often underused tool. Indicating left or right turns and occasionally signaling that you are slowing or stopping gives drivers behind you time to respond. Shoulder checks-quick glances back before moving laterally-both improve your situational awareness and signal to drivers that you may change position. In some contexts, brief eye contact with drivers at side streets or driveways can confirm that they have seen you, though cyclists should never assume eye contact guarantees safe behavior; it is only one piece of information among many.

Urban environments are full of small negotiations: who goes first at an ambiguous junction, how to merge when a bike lane ends, or how to pass a double-parked delivery truck. Calm, deliberate gestures, obvious lane choices, and a willingness to pause briefly rather than forcing a marginal gap can defuse many of these situations. For those cycling as part of a broader wellness routine, reframing these micro-delays as stress-reduction moments rather than annoyances can make commuting feel more sustainable over the long term.

Manage speed, spacing, and road conditions

Speed is a double-edged sword in city riding: going faster reduces your exposure time in traffic but also shortens your reaction window and increases the severity of any crash. The safest approach is context-sensitive speed management-riding briskly where visibility is good and conflicts are few, then easing off in dense, complex environments. Wet roads, leaves, construction gravel, and metal surfaces like manhole covers or tram tracks dramatically reduce traction, especially when cornering or braking. International road safety bodies and cycling federations, including the International Cycling Union (UCI) (uci.org), consistently stress the importance of moderating speed in poor conditions and avoiding sudden maneuvers on low-grip surfaces.

Following distance is just as important for cyclists as for drivers. Tailgating buses, trucks, or other bikes reduces your sightlines and leaves no margin if they brake suddenly or encounter an obstacle. Maintaining a generous buffer gives you time to react to potholes, opening doors, or pedestrians stepping into the street. In stop-and-go traffic, think of your bike as a series of controlled micro-accelerations and gentle decelerations rather than a sequence of sprints and hard stops; this not only improves safety but can also make your commute feel less physically and mentally draining, supporting your overall health and daily energy.

City streets change quickly due to construction, road works, and temporary event closures. A route that felt safe last month may suddenly feature narrowed lanes, new barriers, or heavy machinery intruding into the roadway. When you encounter such changes, slow down and reassess rather than assuming the old pattern still applies. If a detour forces you onto an uncomfortable road, it can be worth dismounting and walking a short section on the sidewalk until you reach a safer stretch. Building flexibility into your commute time-arriving 5-10 minutes early rather than cutting it fine-makes these conservative choices easier to accept.

Gear, bike setup, and maintenance that boost safety

While no equipment can eliminate risk, a well-chosen and well-maintained bike setup can make city riding safer and more enjoyable. A properly fitted helmet remains a widely recommended protective measure, with guidance from organizations such as the Centers for Disease Control and Prevention (cdc.gov) and many national health agencies. The key is correct fit: the helmet should sit level on the head, low on the forehead, with snug straps and minimal movement when you shake your head. Some modern helmets also include technologies designed to reduce rotational forces in certain impacts, though they are not a substitute for careful riding.

Brakes and tires are your primary safety hardware. Regularly check that your brake pads have sufficient material, are correctly aligned, and can lock each wheel with firm lever pressure. Tires suited to urban riding-often slightly wider, with puncture protection and reflective sidewalls-provide better grip and resilience on rough city surfaces than narrow racing tires. Keeping them inflated within the recommended pressure range improves handling and reduces pinch flats. Routine maintenance, whether done at home or by a local bike shop, should include chain lubrication, bolt checks, and occasional inspections of wheels and frame for cracks or damage.

Accessories can also enhance safety and practicality. Bells or electronic horns are required by law in some regions and are useful for alerting pedestrians and other cyclists. Fenders keep water and grit off you and your drivetrain, encouraging year-round riding and reducing wear. Sturdy racks and panniers allow you to carry work gear, groceries, or sports equipment without a heavy backpack that shifts your center of gravity and traps sweat, which is particularly relevant for riders balancing commuting with sports or gym sessions. For those interested in smart tech, app-connected lights, GPS trackers, and crash-detection features in some wearables can add another layer of reassurance, though they should complement, not replace, core safety habits.

Mental focus, distractions, and riding under stress

Urban cycling is cognitively demanding. It requires continuous scanning, risk assessment, and quick decision-making. Riding while mentally overloaded, angry, or distracted significantly increases the chance of errors. Just as drivers are urged by bodies like the World Health Organization and national transport agencies to avoid phone use, cyclists should also keep distractions to a minimum. That means avoiding texting or browsing while riding and being cautious with headphones. In many places, using headphones on the bike is legal, but isolating yourself from traffic sounds with noise-cancelling or high-volume audio can be risky. If you choose to use them, consider single-ear or bone-conduction options and keep the volume low enough to hear horns, sirens, and approaching vehicles.

Stress management is another underappreciated safety factor. Running late, dealing with work pressures, or navigating aggressive drivers can push riders toward impulsive choices-squeezing through tight gaps, jumping lights, or taking risky shortcuts. Recognizing these emotional triggers and deliberately choosing a calmer response can be life-saving. Building a small time buffer into your commute, practicing a few deep breaths at red lights, or viewing your ride as part of your overall wellness routine rather than a race against the clock can shift your mindset toward patience and self-preservation.

Fatigue also matters. Long workdays, heavy training loads, or lack of sleep impair reaction times and situational awareness. If you feel dangerously tired or unwell, it may be safer to combine your bike trip with public transport, take a slower route, or even leave the bike and walk or ride-share for part of the journey. Employers and city planners increasingly recognize the role of active commuting in health and productivity; some workplaces now offer secure bike parking, showers, and flexible start times, making it easier to prioritize safety over speed.

What to do if something goes wrong

Even with the best preparation and habits, crashes and near-misses can happen on busy streets. Knowing what to do in the aftermath can protect your health and your rights. After any incident, first check yourself and others for injuries. If anyone is seriously hurt, call emergency services immediately; in many countries, guidance from health authorities like the National Health Service in the UK (nhs.uk) or national emergency medical services emphasizes not moving someone with suspected head, neck, or spinal injuries unless there is immediate danger. If you are able, move yourself and your bike out of active traffic to avoid secondary collisions.

If a motor vehicle is involved and you are safe to do so, exchange details with the driver, including name, contact information, and insurance. Note the vehicle's registration number, make, model, and color, and, if possible, collect contact details from any witnesses. Take photos of the scene, your bike, any visible injuries, and relevant road features such as signage, lane markings, or obstructions. In many jurisdictions, cyclists have the same rights as drivers regarding insurance claims and legal recourse, and documentation is critical. If you feel unwell later-especially with symptoms like headache, dizziness, nausea, or confusion-seek medical evaluation, as some injuries (including concussions) may not be obvious immediately.

Near-miss reporting is also gaining traction as a safety tool. Some cities and advocacy groups collect data on close passes, dangerous junctions, and recurring conflict points to inform infrastructure improvements. Participating in these schemes, when available, can turn a frightening experience into information that helps prevent future incidents for others. At the personal level, reviewing what happened-without self-blame-can help you adjust routes, timing, or habits to reduce similar risks in the future.

Building a safer cycling culture in cities

Individual behavior is only one piece of urban cycling safety; infrastructure design, driver education, and policy choices all play major roles. Organizations such as the World Resources Institute (wri.org) and OECD's International Transport Forum (itf-oecd.org) have repeatedly found that cities investing in protected bike lanes, lower speed limits, and traffic-calming measures see reductions in serious injuries for all road users, not just cyclists. Supporting local campaigns for safer streets, participating in community consultations, and sharing constructive feedback with city officials can gradually improve conditions for everyone who walks, rides, or drives.

For many people, cycling is not just transportation but part of a broader fitness and health strategy, a way to reduce emissions, and a means of engaging with their city at human scale. The safer and more welcoming streets become, the more people feel able to choose active travel over short car trips, with knock-on benefits for air quality, congestion, and public health. Collaborations between public health agencies, transport departments, and community groups are increasingly common, and their work often draws on best-practice examples from cities worldwide.

At the individual level, the most effective approach combines respect for the rules, smart route choices, visible and predictable riding, and a mindset that values arriving safely over arriving quickly. With those elements in place, busy city streets become more navigable, and cycling can remain what it should be: a practical, enjoyable, and health-promoting way to move through the urban landscape.